Quickstart
This tutorial will guide you through the process of creating a local model card from Hugging Face and deploying the model card to the local server or a serverless GPU cloud.
Prerequisites
Install fedml, the serving library provided by TensorOpera AI, on your machine.
pip install fedml
Create a model from Hugging Face
Use fedml model create command to create a model card on your local machine. In this quick start tutorial, we will try
to deploy an EleutherAI/pythia-70m model from Hugging Face.
To give the model card a name, use -n option. To use a hugging face model, you will need to indicate the model source with -m option, and
use hf: as the prefix of the organization name and model name.
Currently we support importing text2text-generation model from Hugging Face, for other type of model, you need to create a custom model card. See the Create a Model Card tutorial for more details.
fedml model create -n hf_model -m hf:EleutherAI/pythia-70m
Deploy the model to the local machine
Use fedml model deploy command to deploy the model. Use -n to indicate the model card name.
Use --local option to deploy to the current machine.
fedml model deploy -n hf_model --local
The prerequisite dependencies will be automatically installed. After the local endpoint is started, use a curl command to test the inference server.
curl -XPOST localhost:2345/predict -d '{"text": "Hello"}'
You will see the output from the terminal with the response of that model.
"{'generated_text': '...'}"
Deploy the model to a Serverless GPU Cloud
Before you start, you will need to create an account on TensorOpera AI.
Use fedml model push to push the model card to TensorOpera AI Cloud. Replace $api_key with your own API key. The API Key can be found from the profile page.
fedml model push -n hf_model -k $api_key
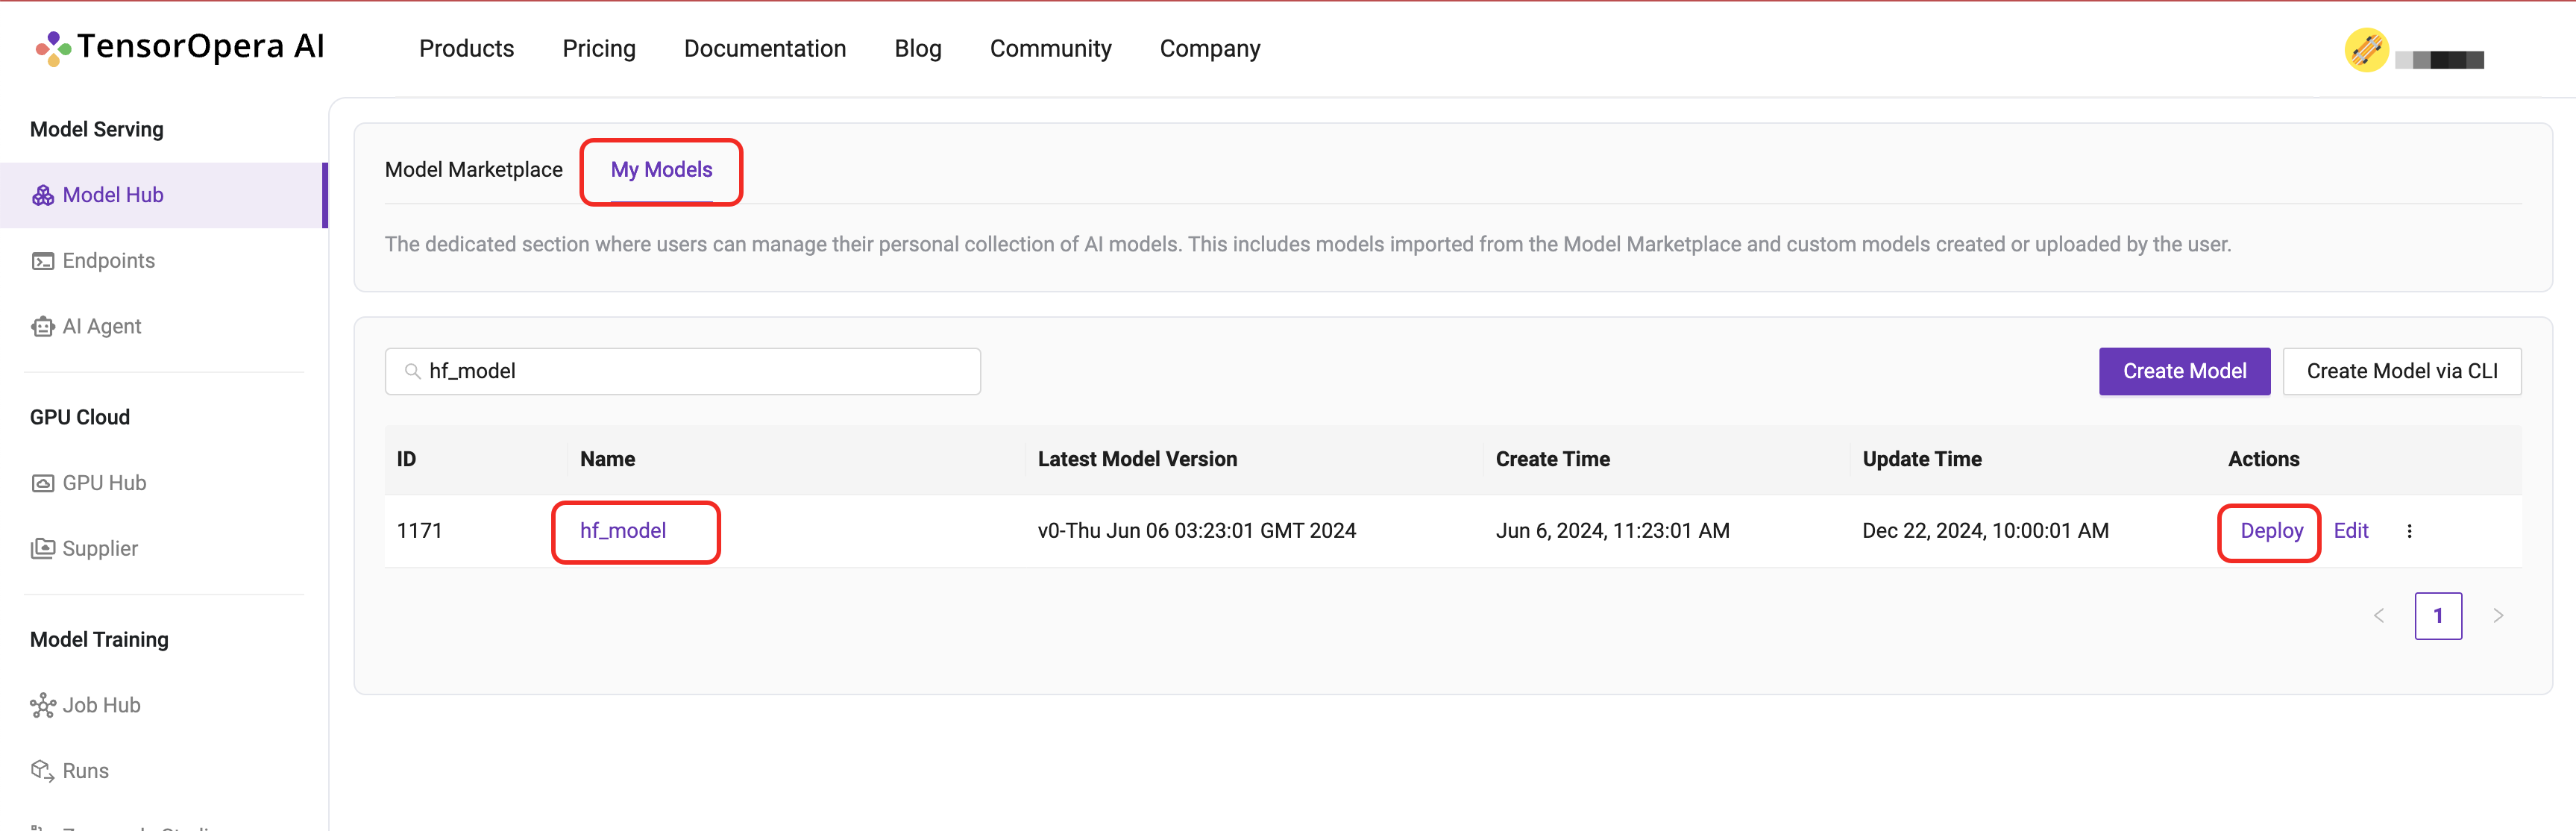
After you push the model card to TensorOpera AI Cloud, you can deploy the model by going to the
Model Serving -> Model Hub -> My Models tab on the TensorOpera AI Platform dashboard.
Click the Deploy button to deploy the model.
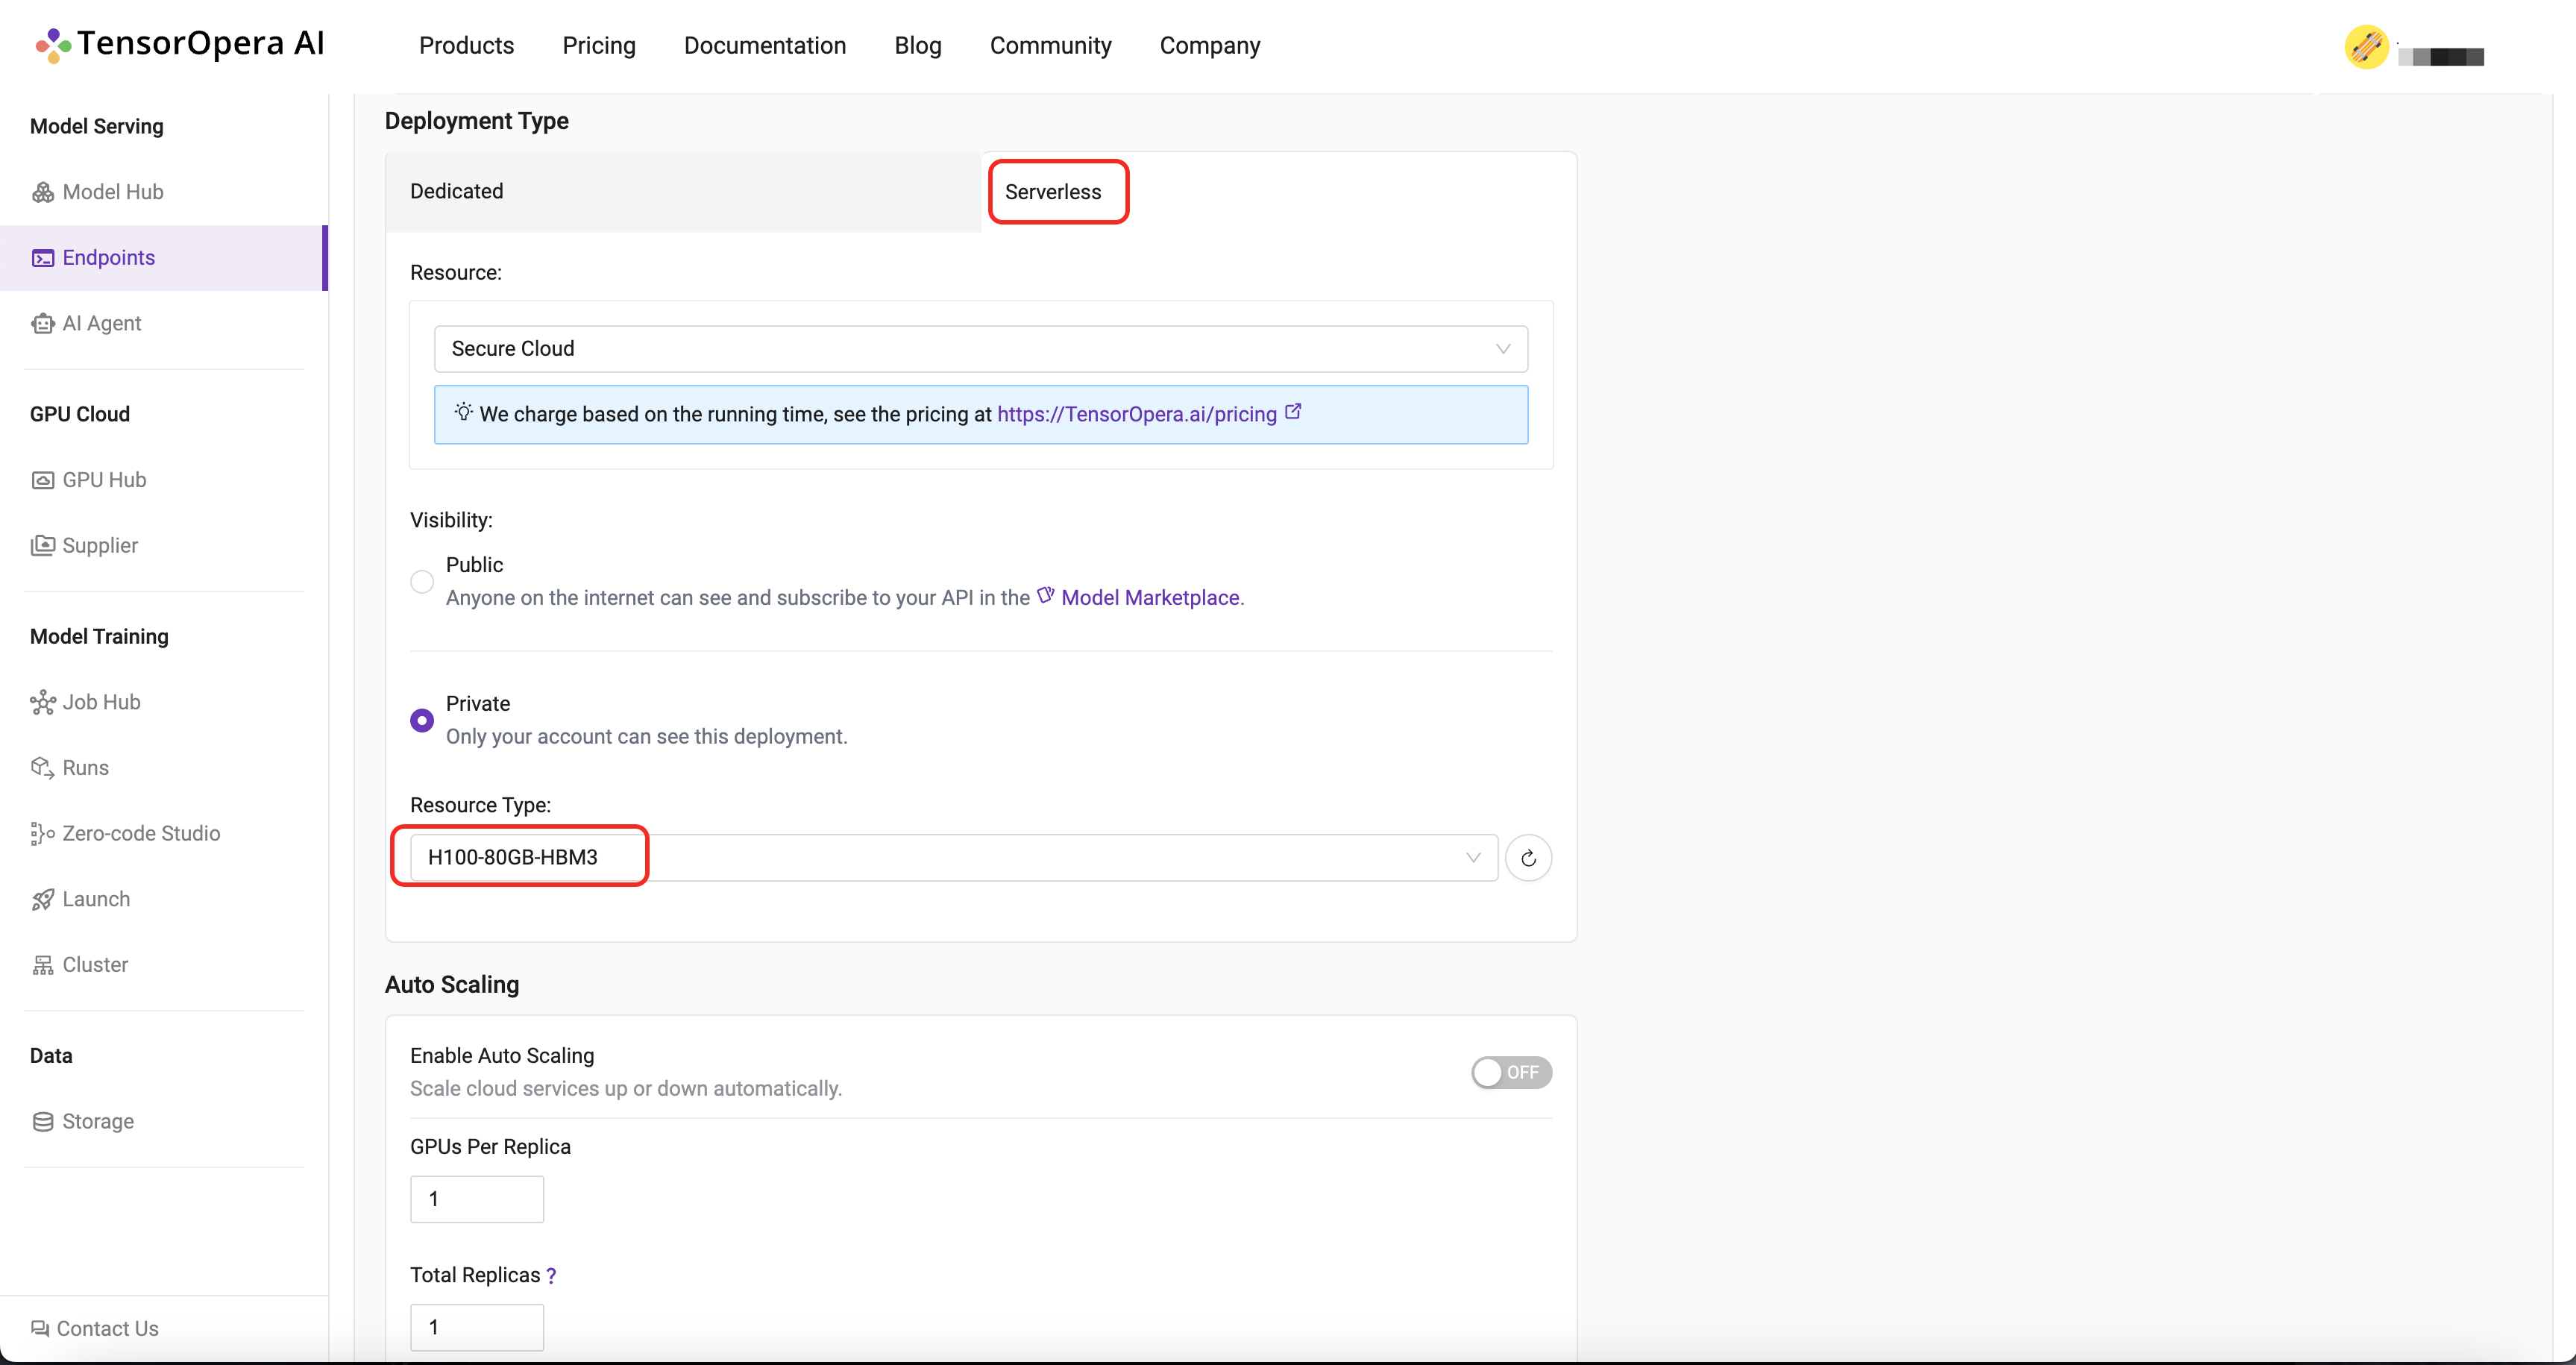
For this quick start tutorial, we can select the Serverless H100-80GB-HBM3 option and click the Deploy button.
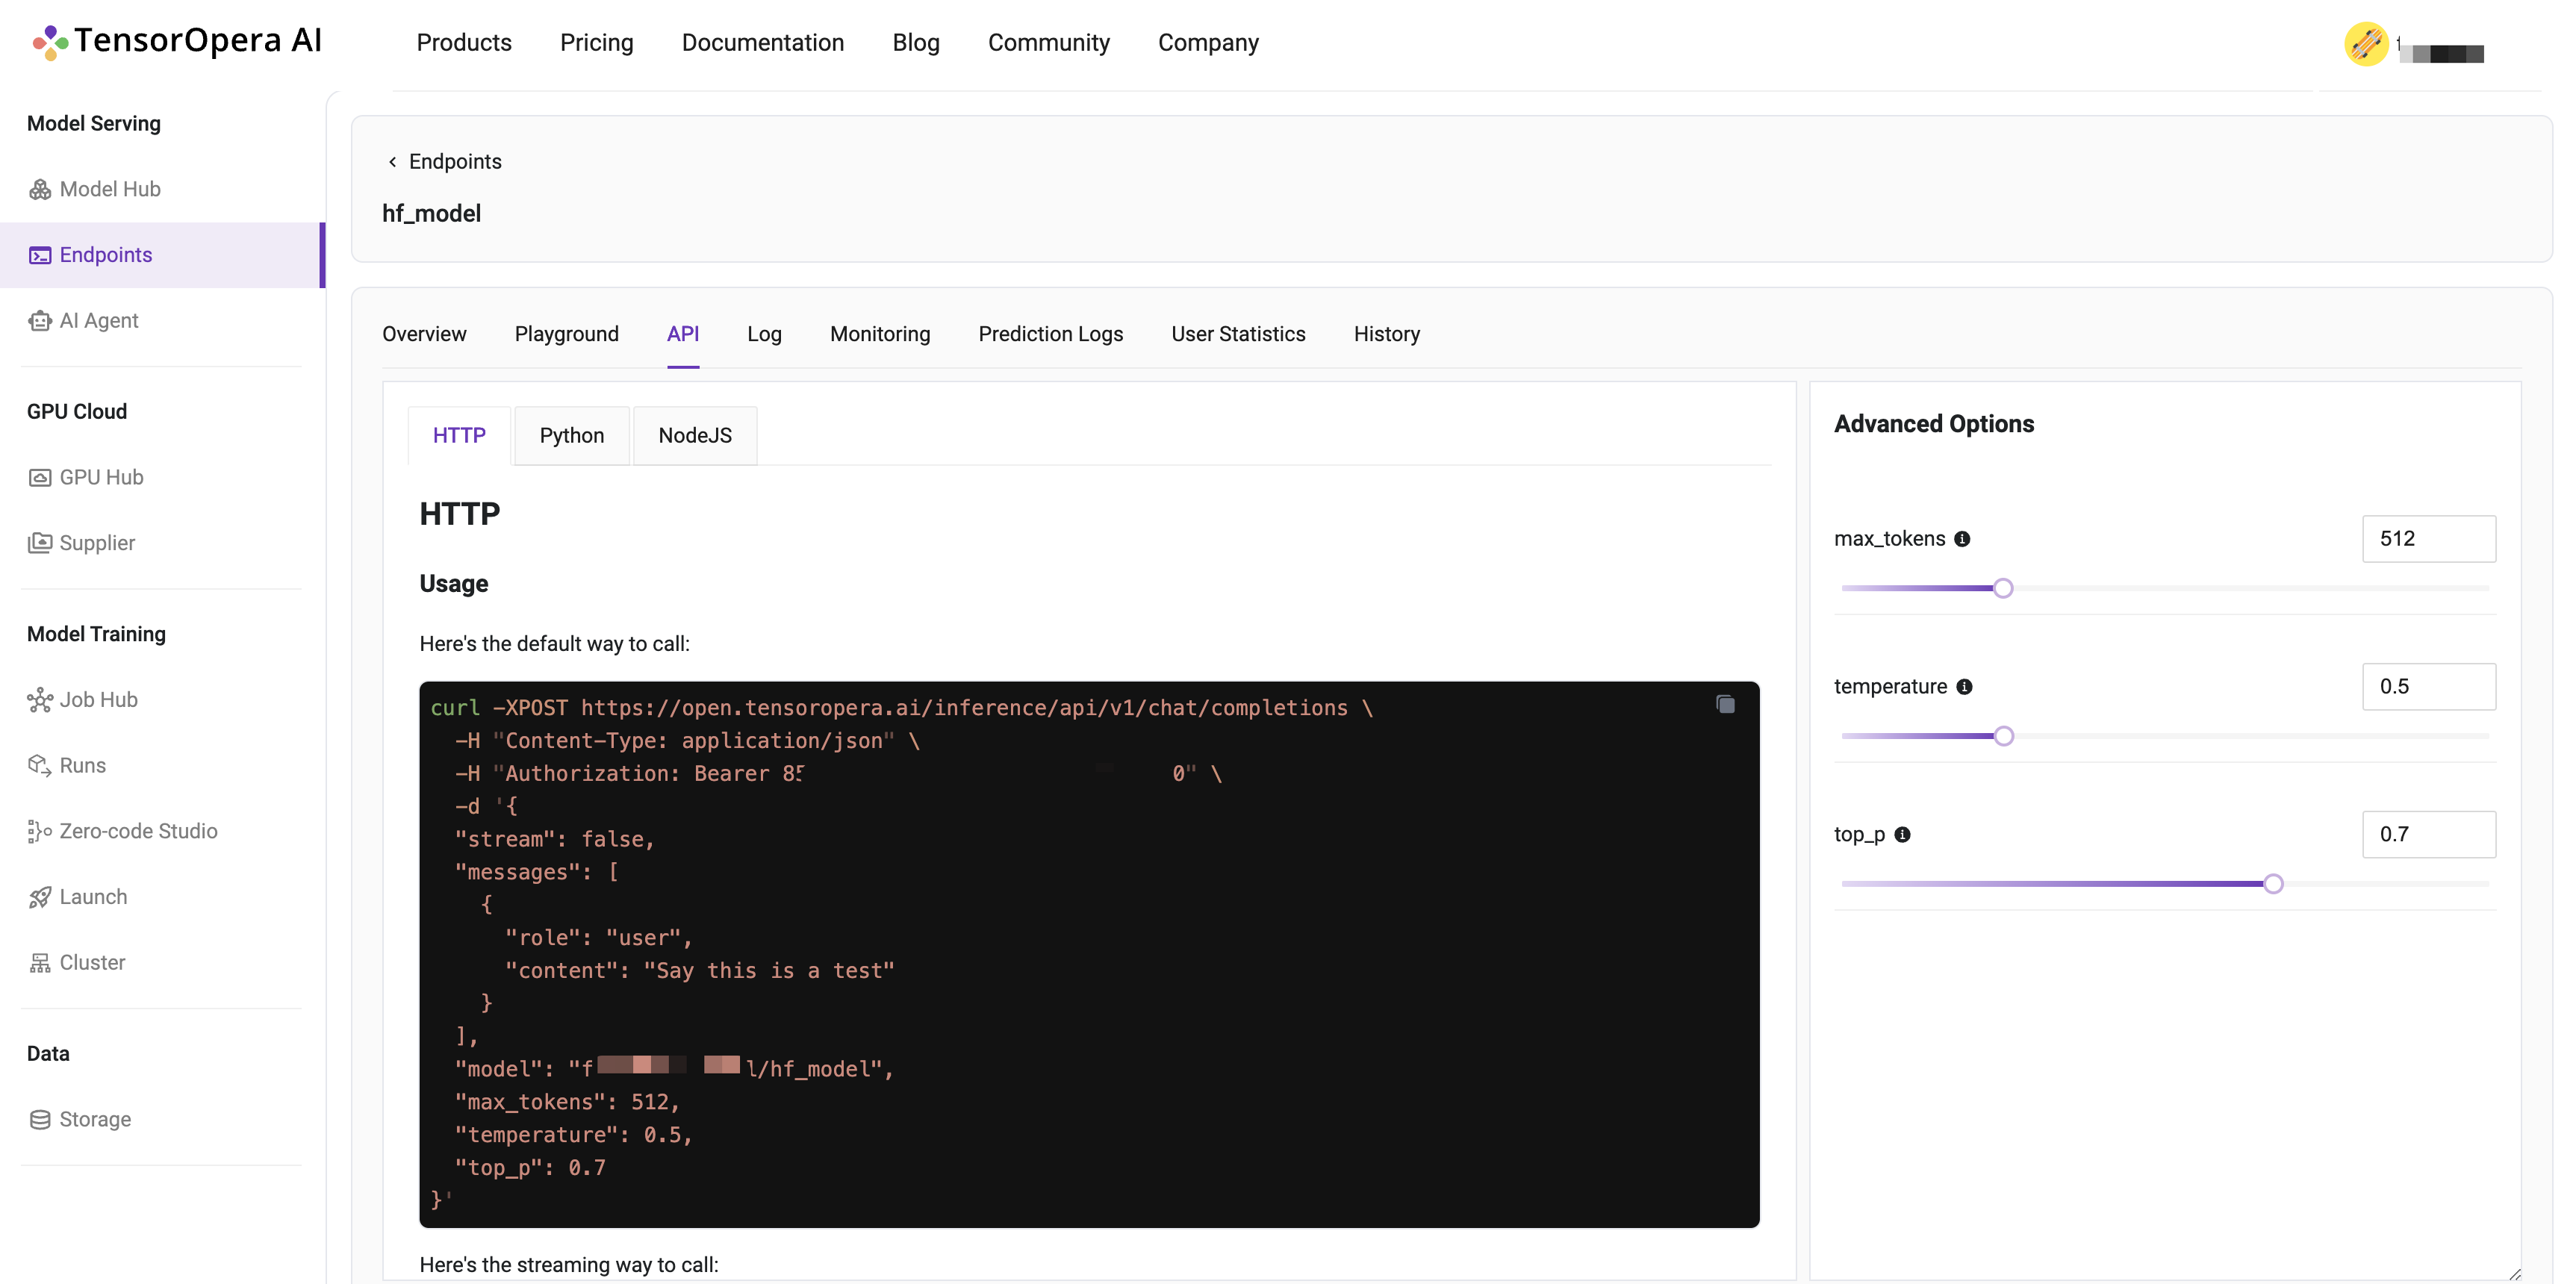
After few minutes, the model will be deployed to the serverless GPU cloud. You can find the deployment details in the Model Serving -> Endpoints tab in the TensorOpera AI Cloud dashboard.

You may interact with the deployed model by clicking the Playground tab in the deployment details page, or using the cURL, Python, or Javascript commands under the API tab.
What's next?
To create and serve your own model card, follow the next tutorial Create a Model Card.