Supply GPUs and Earn
1. Supplier Setup
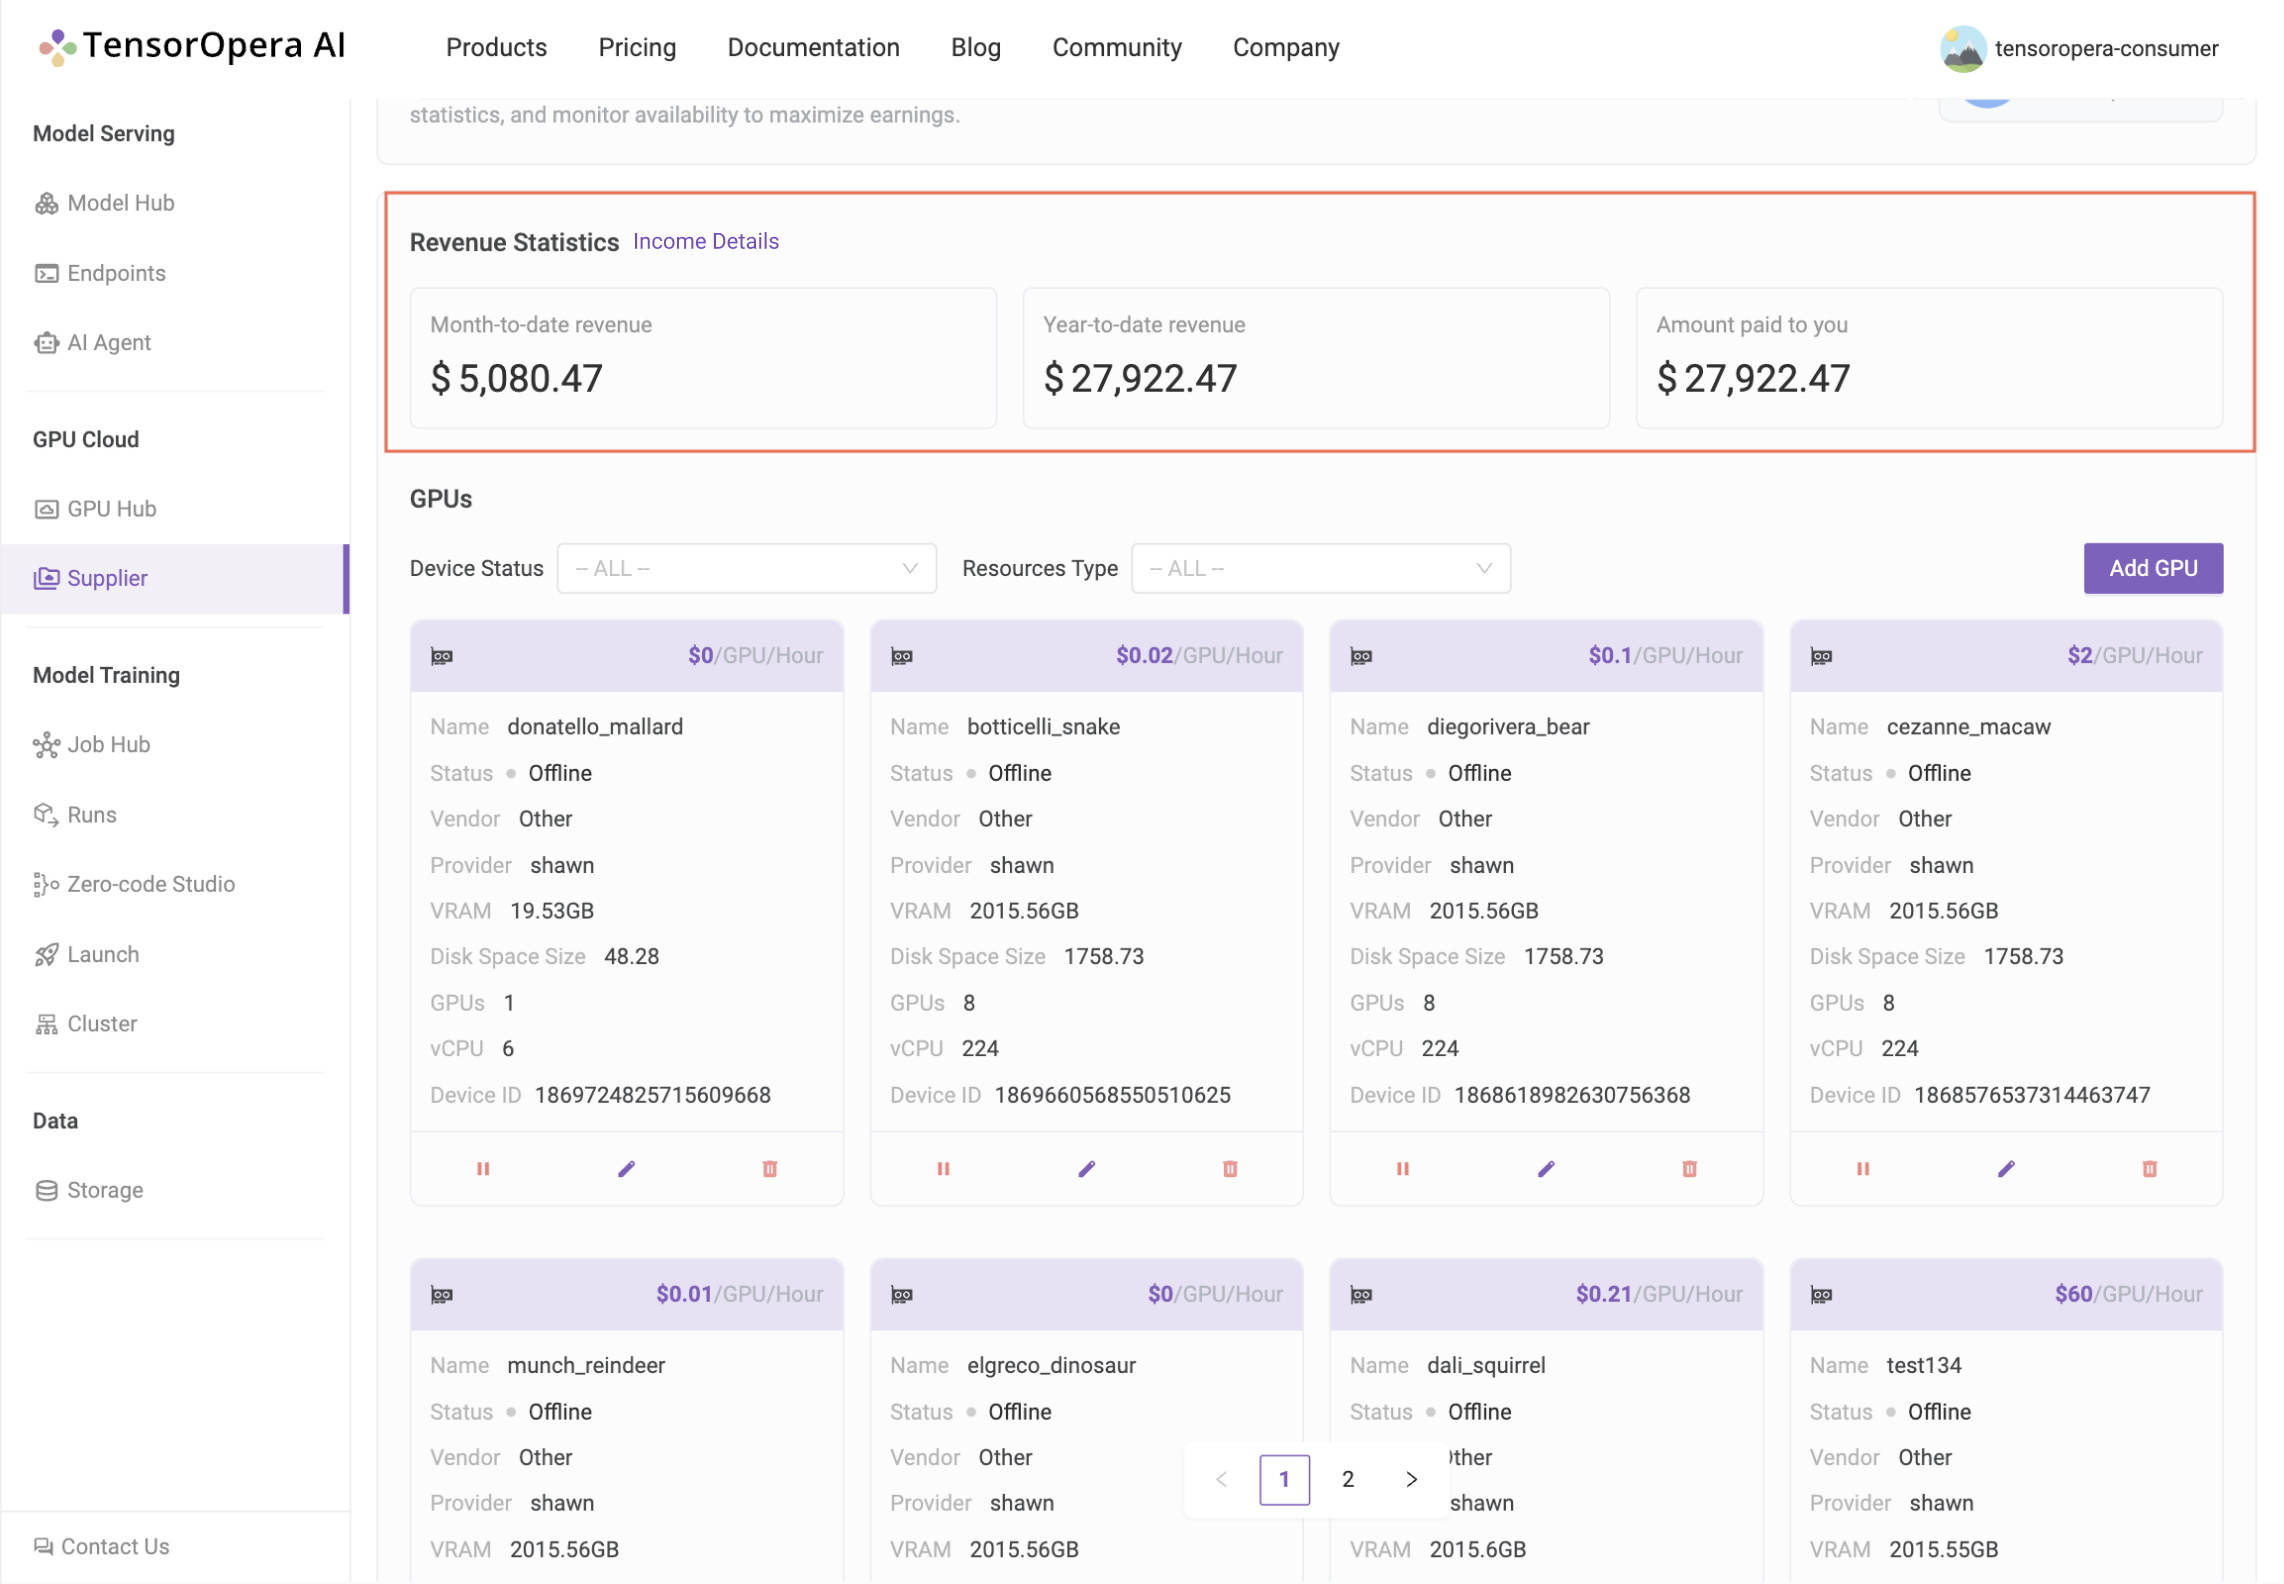
1.1) Login to the TensorOpera AI Platform and navigate to the Supplier page.
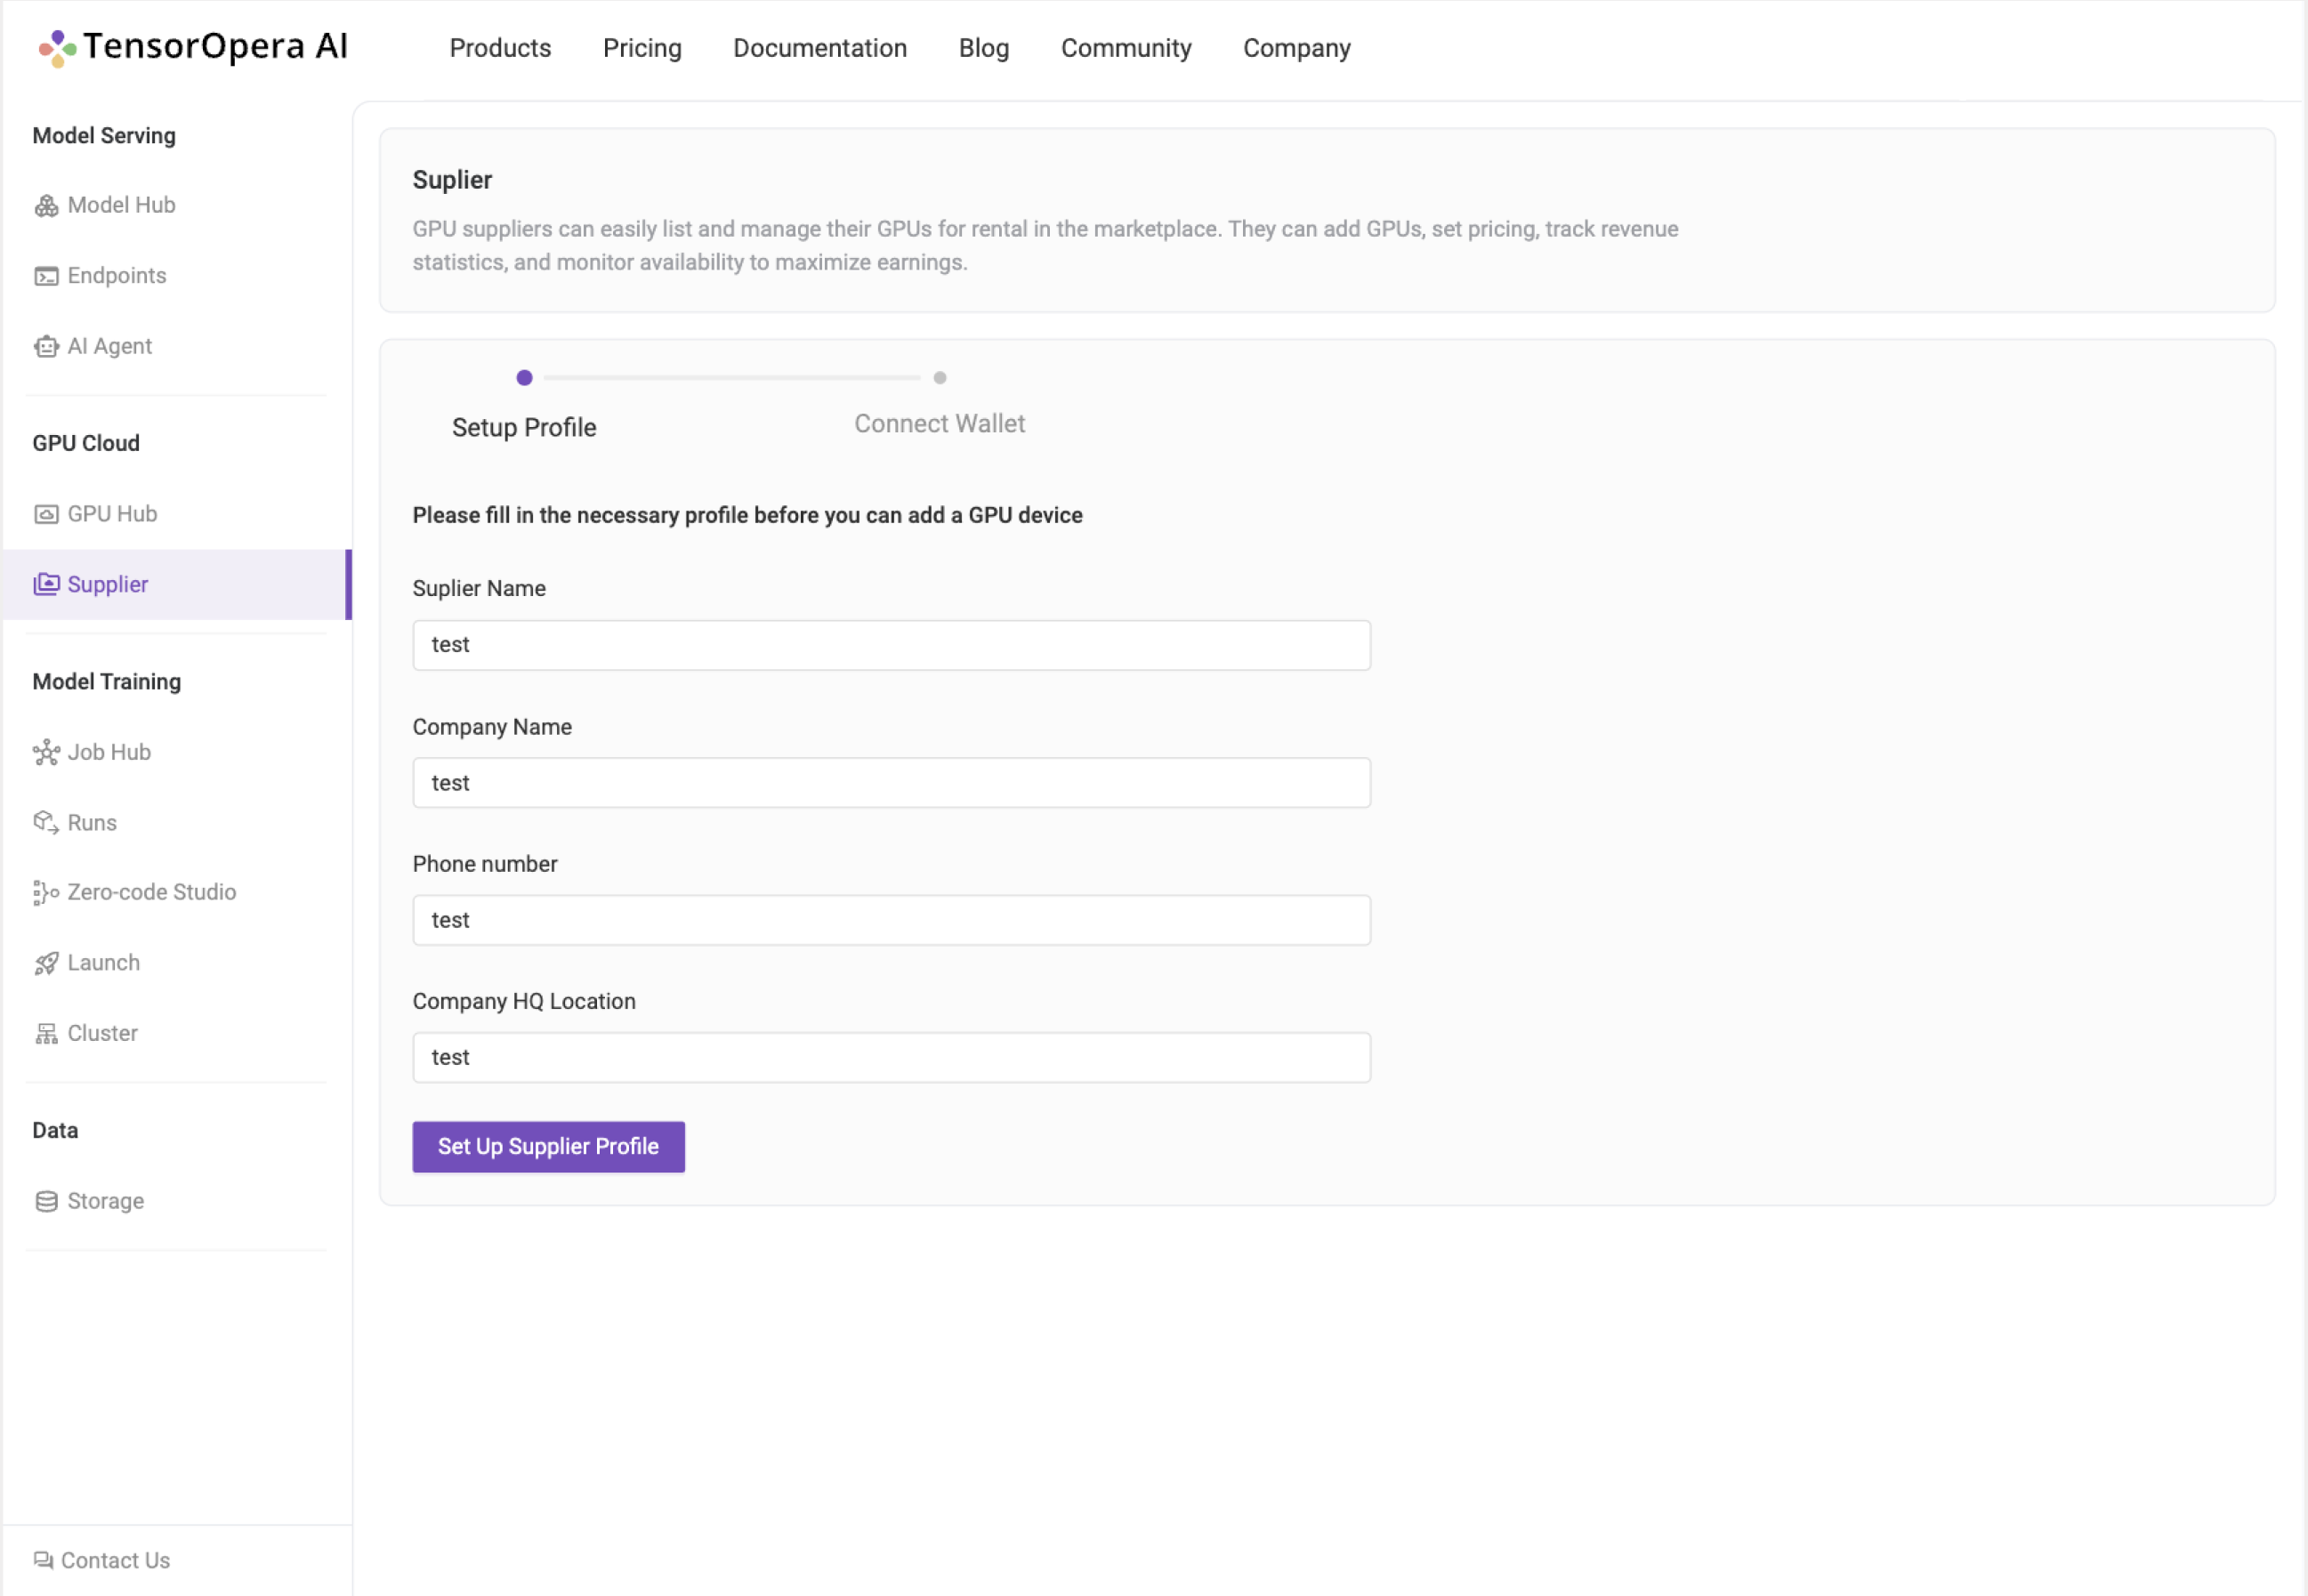
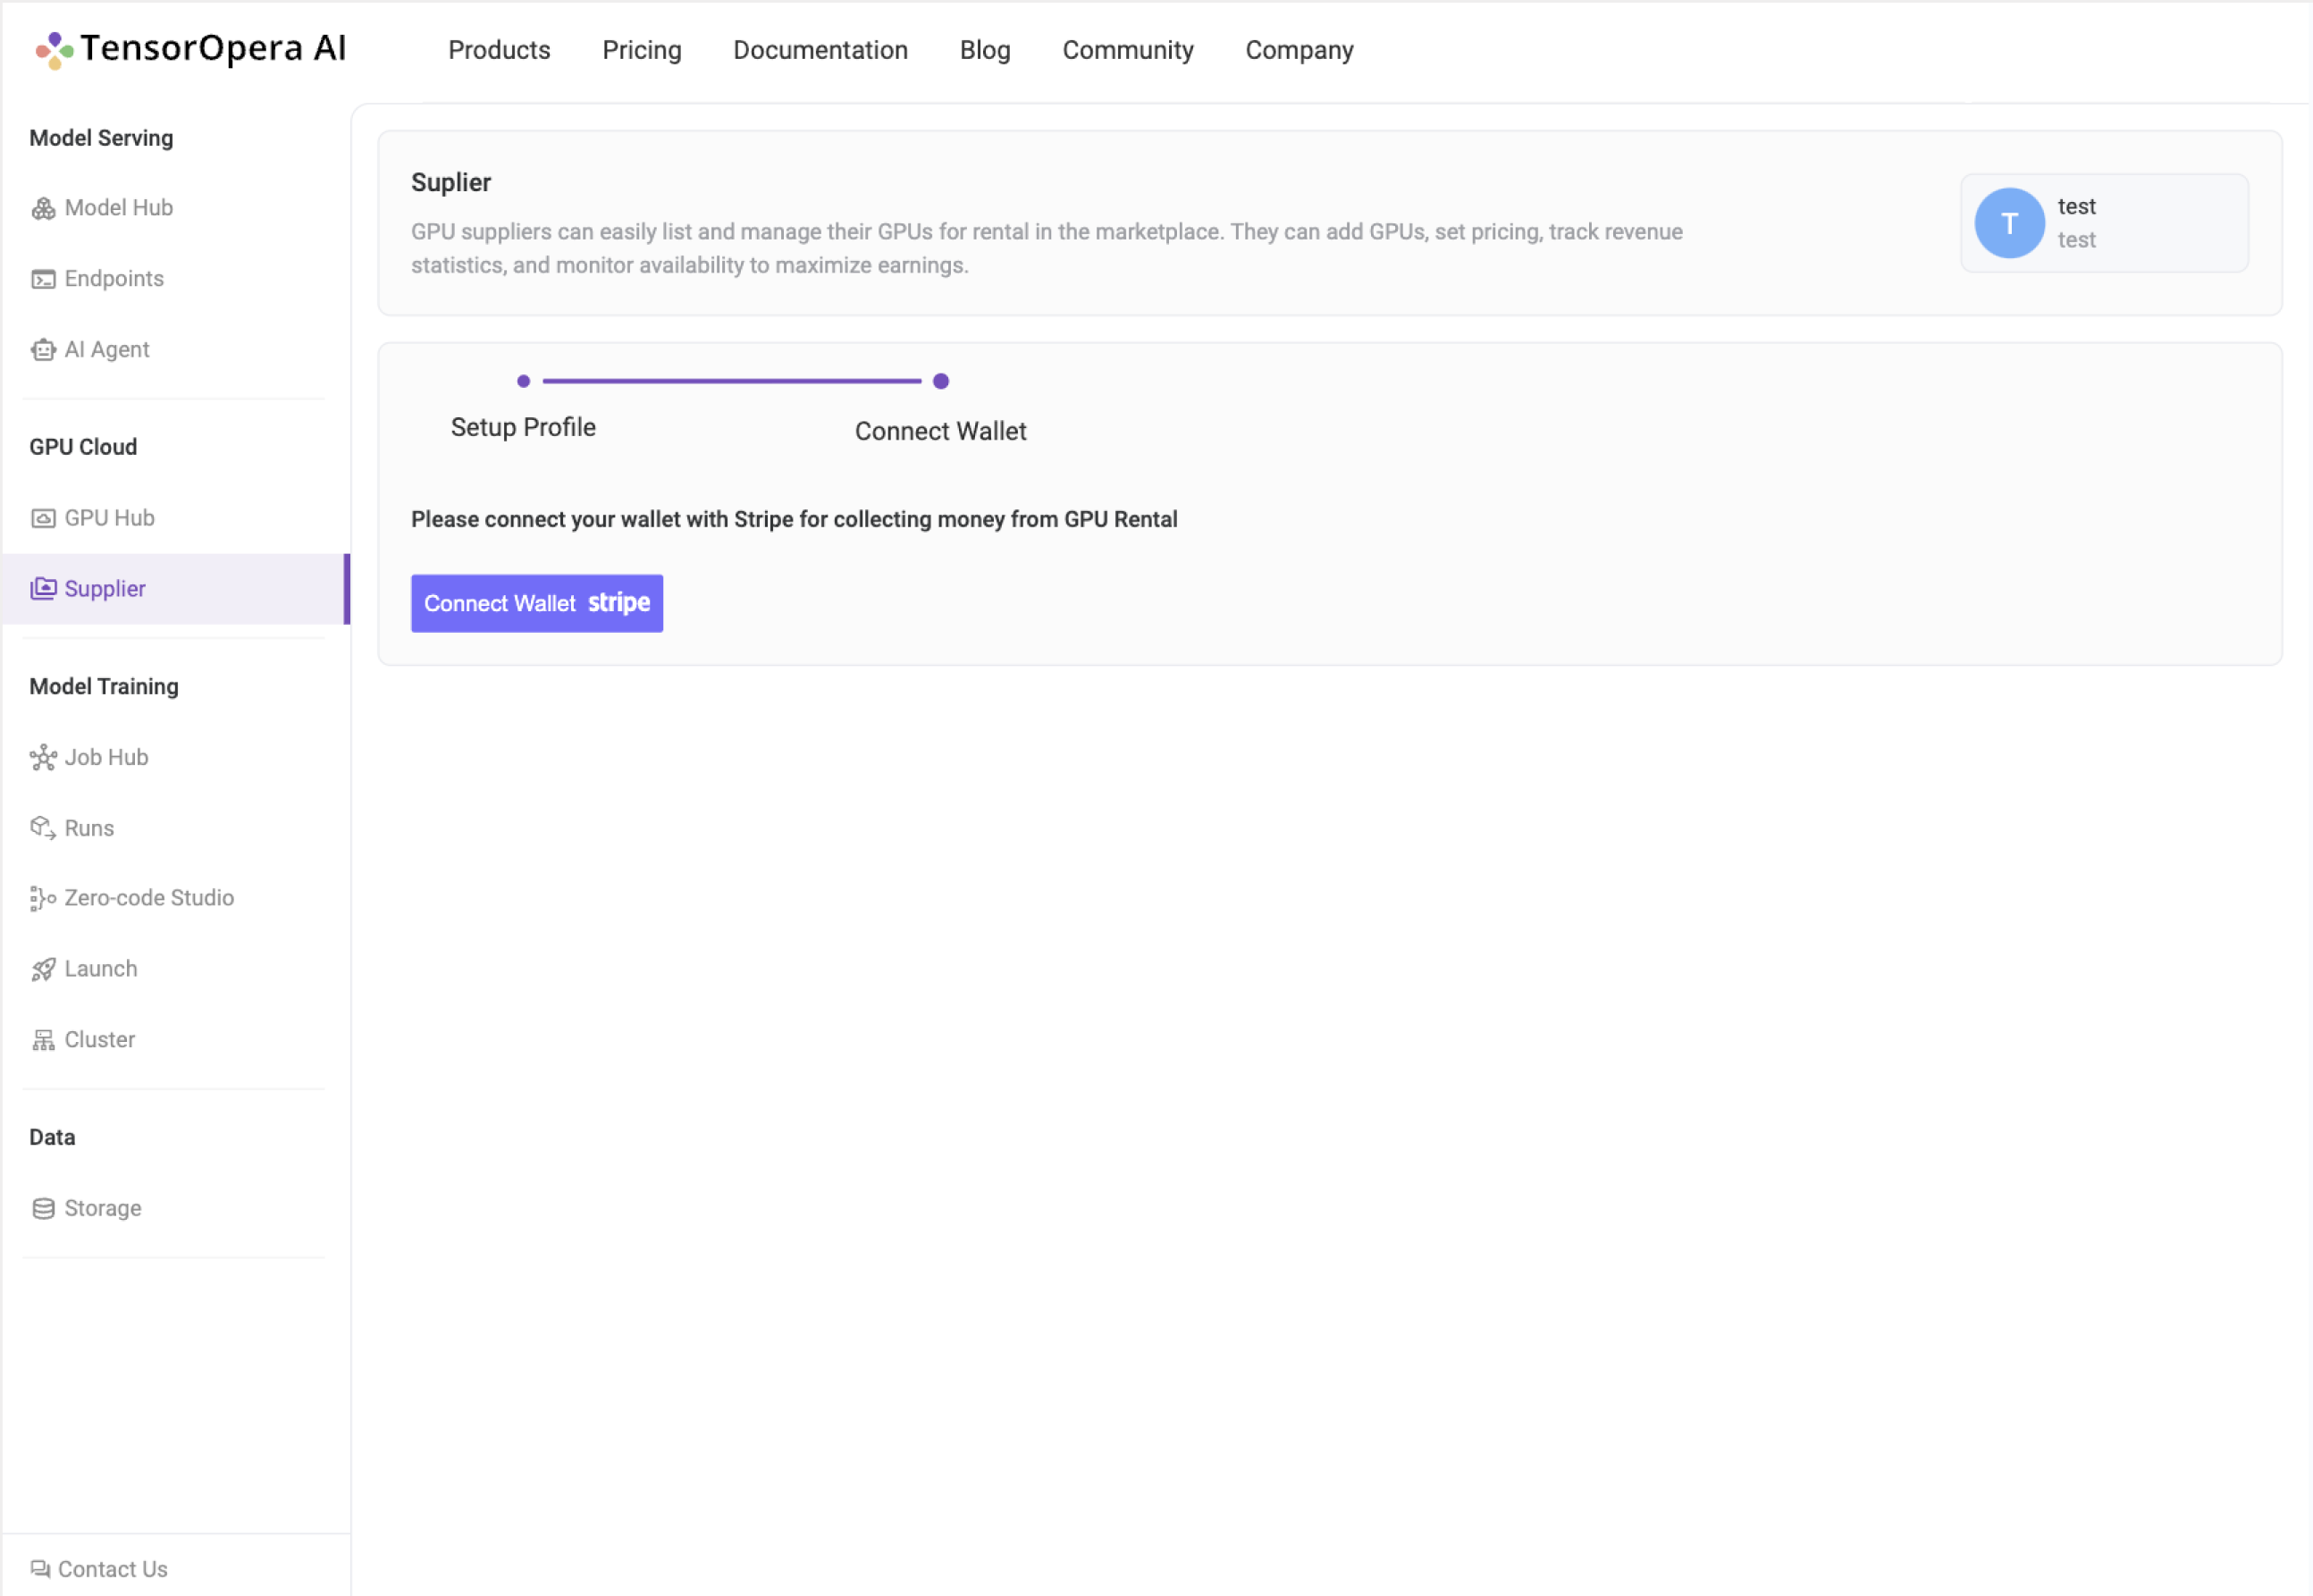
1.2) Setup Stripe account or just connect if you have one already to get paid by TensorOpera AI.
2. Add GPUs
2.1) Prerequisites:
Need to have a GPU server with NVIDIA GPU(s) installed and CUDA drivers installed. To check if nvidia drivers are installed, run the following command:
nvidia-smi
If you see the output with GPU details, you are good to go.
If you don't have nvidia drivers installed, you can first try to install them using the following command:
sudo ubuntu-drivers autoinstall
sudo apt install nvidia-cuda-toolkit
sudo reboot
nvidia-smi
If the above commands don't work, you can follow the instructions on NVIDIA's official website here.
2.2) Execute the following binding script on your GPU server:
The following two commands are to be executed from within the compute nodes which you would like to bind to the FEDML platform
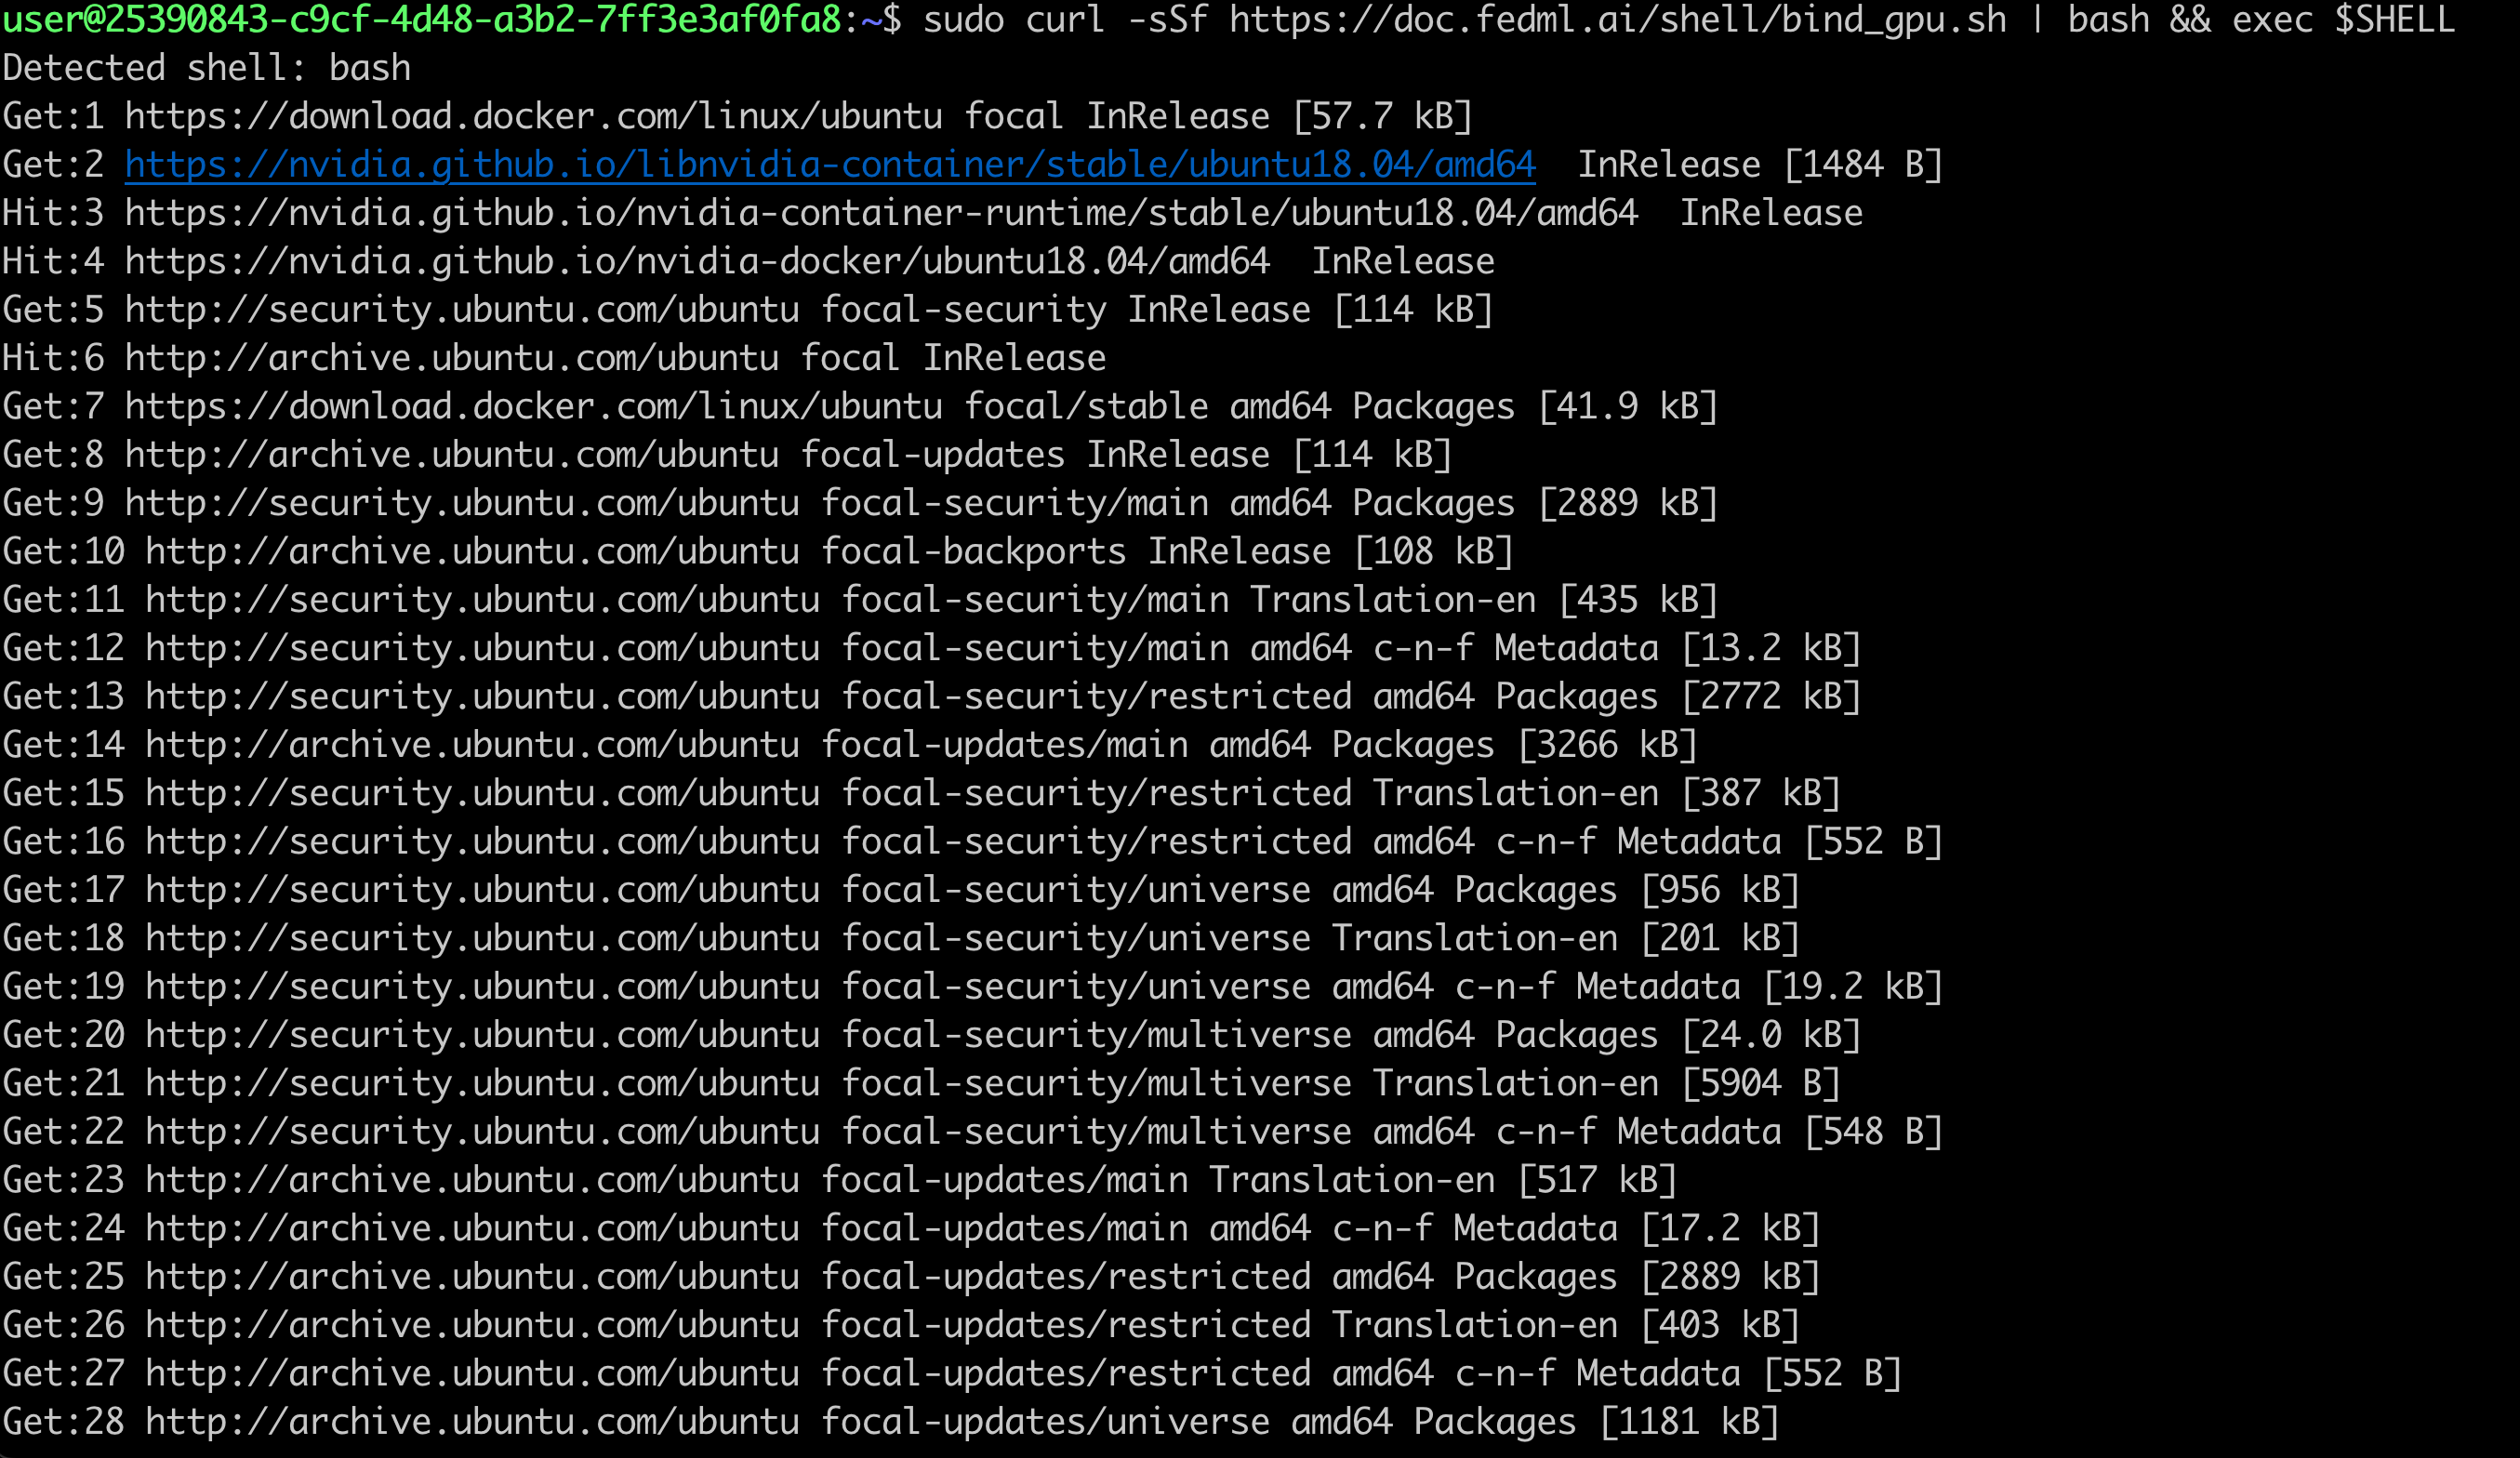
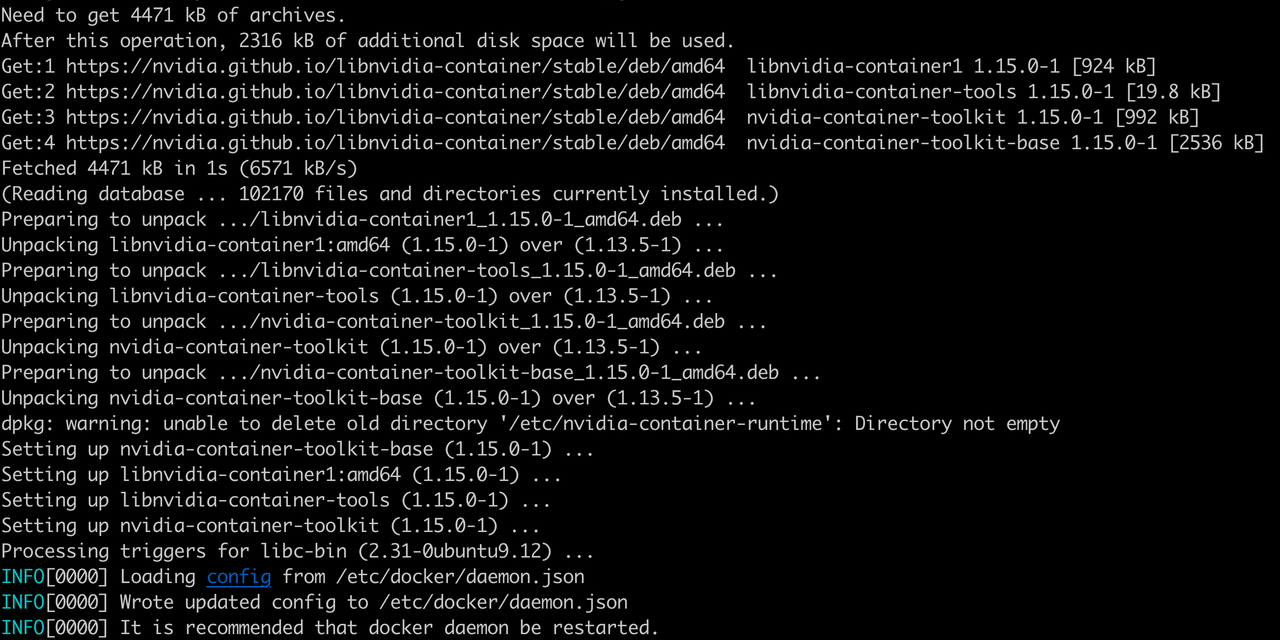
2.2.1) Execute the first command to install fedml and related libraries
sudo curl -sSf https://doc.fedml.ai/shell/bind_gpu.sh | bash && exec $SHELL
What does the terminal output of successful execution of this step look like?
2.2.2) Verify the installation of fedml library on your GPU server:
sudo curl -sSf https://doc.fedml.ai/shell/verify_installation_driver.sh | bash
The output should look like below:
What does the terminal output of successful execution of this step look like?
You should see output like below in your node terminal

2.3) Navigate to Supplier page and click on Add GPU button. Copy one-line login command for binding your GPU servers.
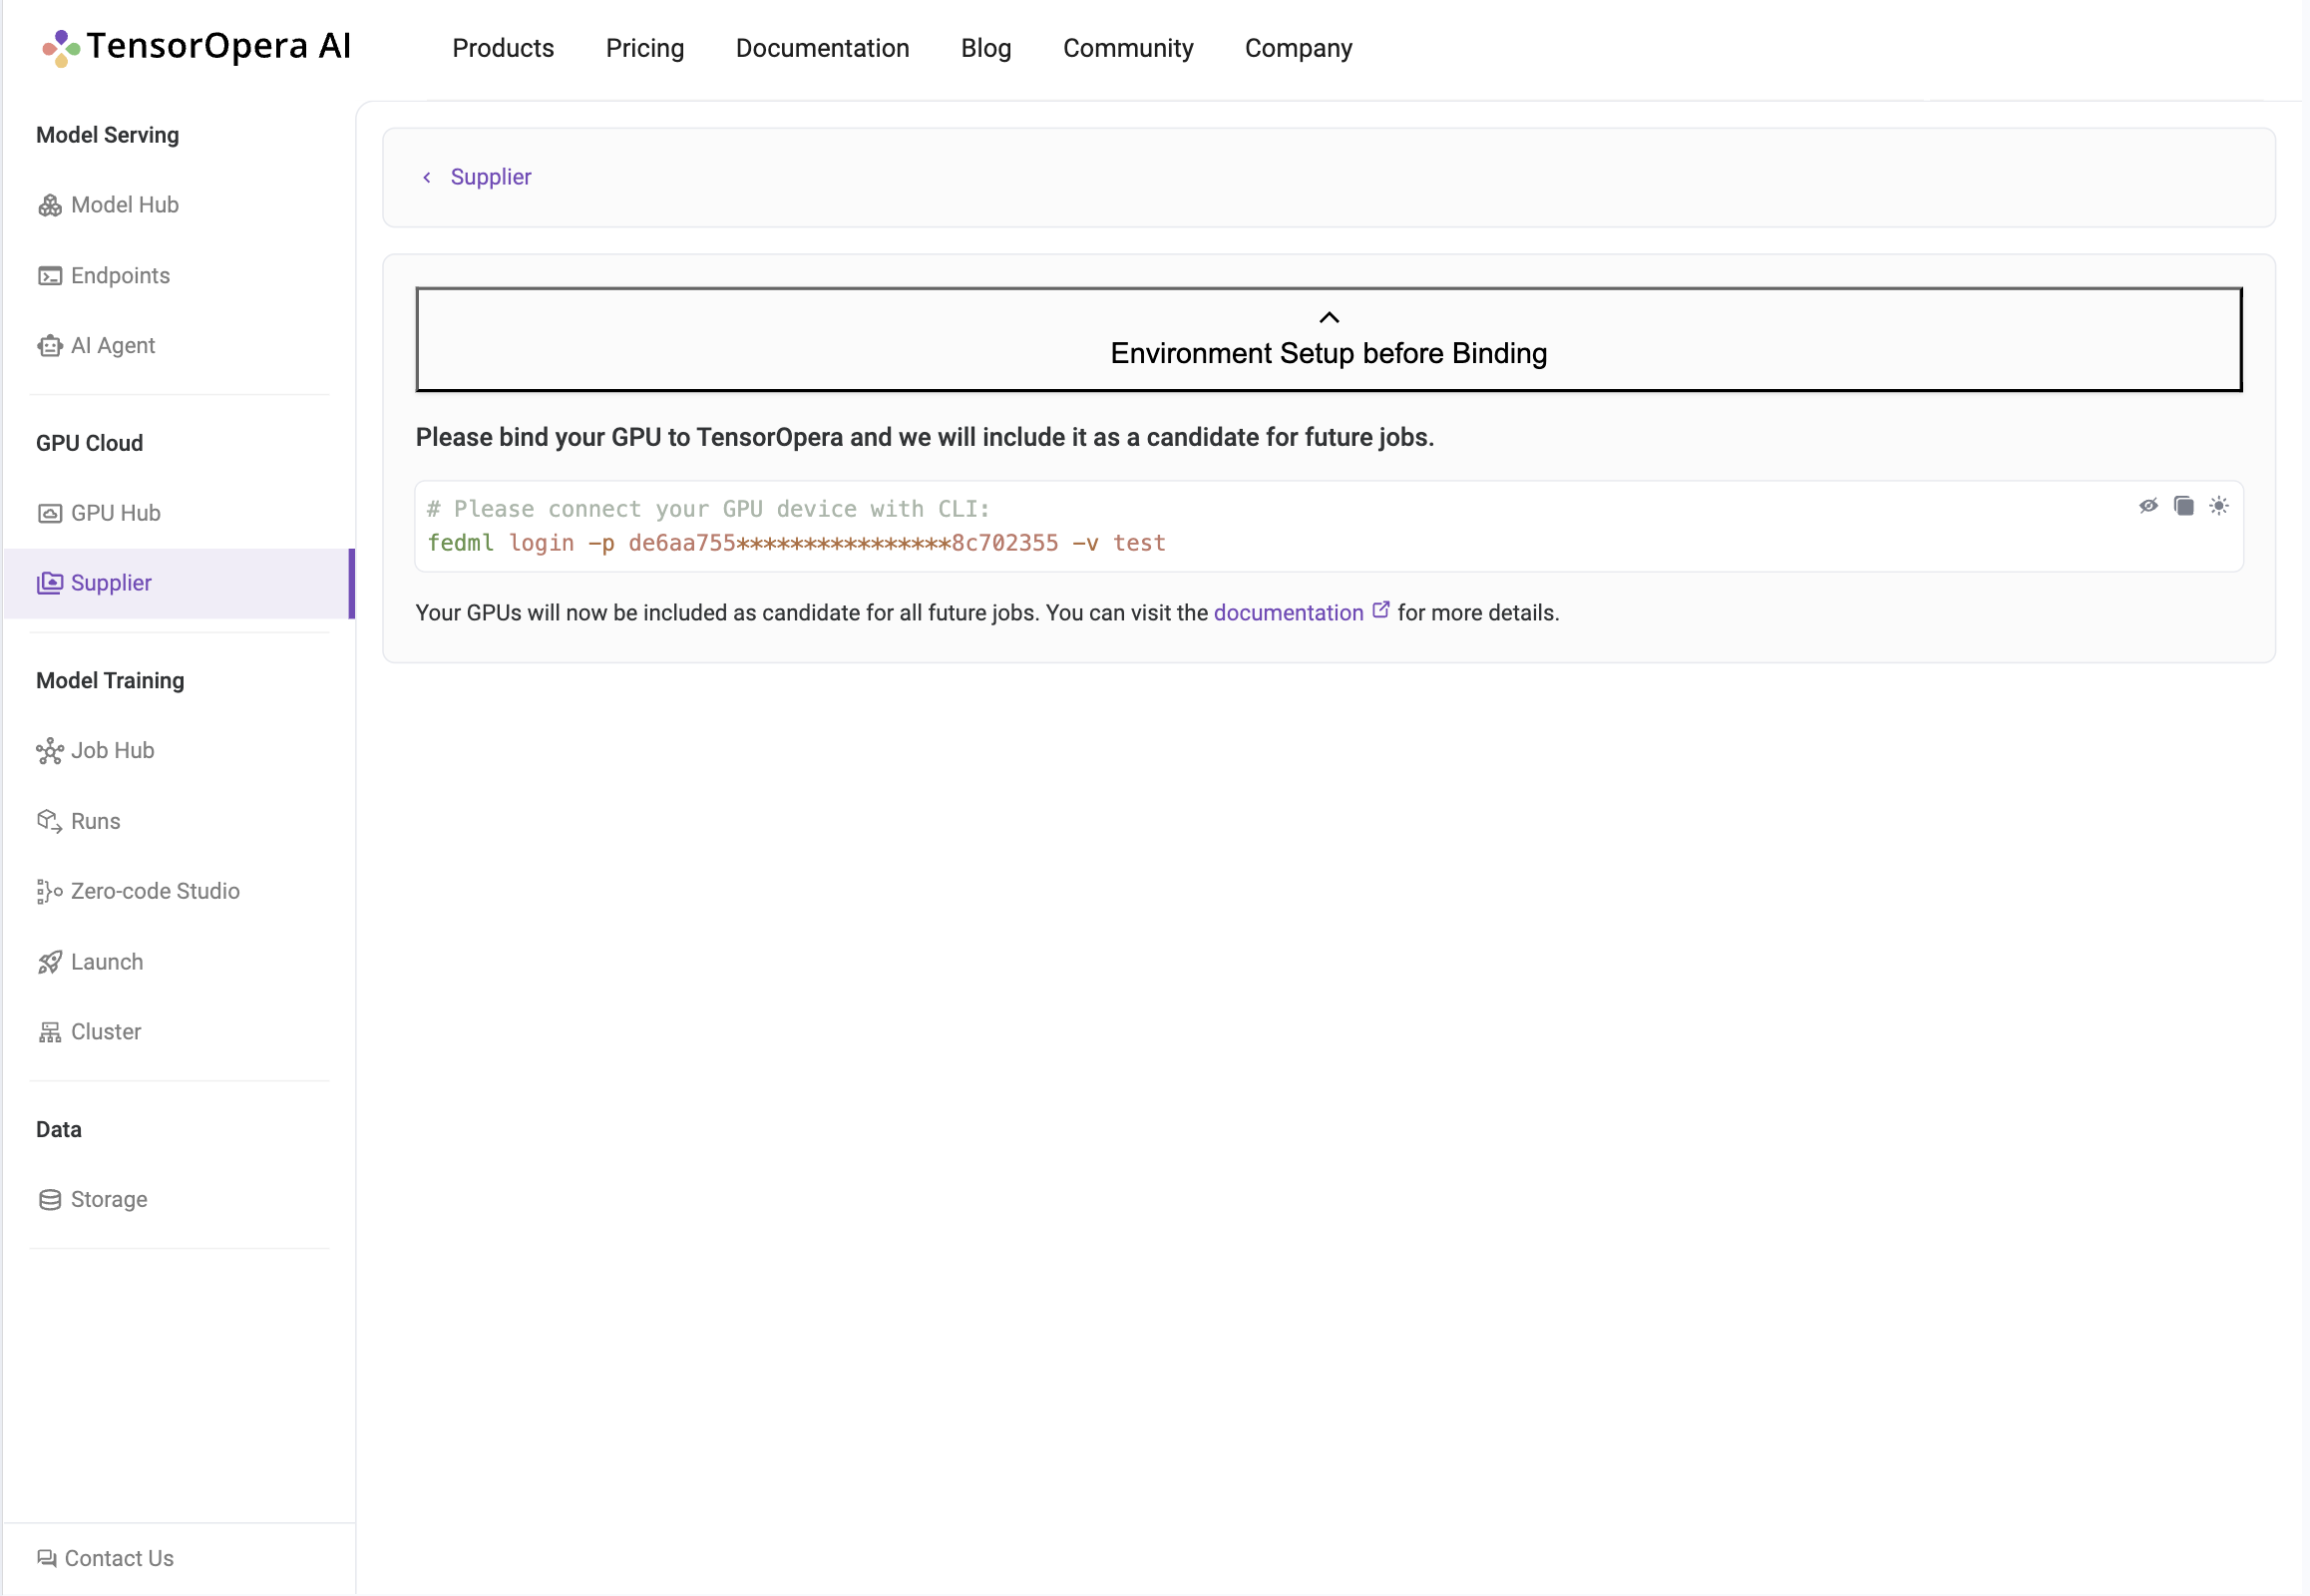
From your GPU server terminal, execute the login command copied in from the platform.
Below is output of command when executed on a FedML® GPU server:
(fedml) alay@a6000:~$ fedml login -p 3b24dd2f****************206e8669

 Welcome to FedML.ai!
 Start to login the current device to the FedML® Nexus AI Platform

(fedml) alay@a6000:~$

Congratulations, your device is connected to the TensorOpera AI platform successfully!
Your FedML Edge ID is 1717367167533584384, unique device ID is 0xa11081eb21f1@Linux.Edge.GPU.Supplier

You may visit the following url to fill in more information with your device.
https://fedml.ai/gpu-supplier/gpu/edit/1717367167533584384
As instructed by the output, next you need to visit the url to fill in more information about your GPU server.
3. Fill in GPU server details
3.1) Navigate to Supplier page and click on the Edit button to fill in more information about your GPU servers.
You can also click through or copy the url link in the terminal output of previous step into browser of your choice to directly go to the edit page.
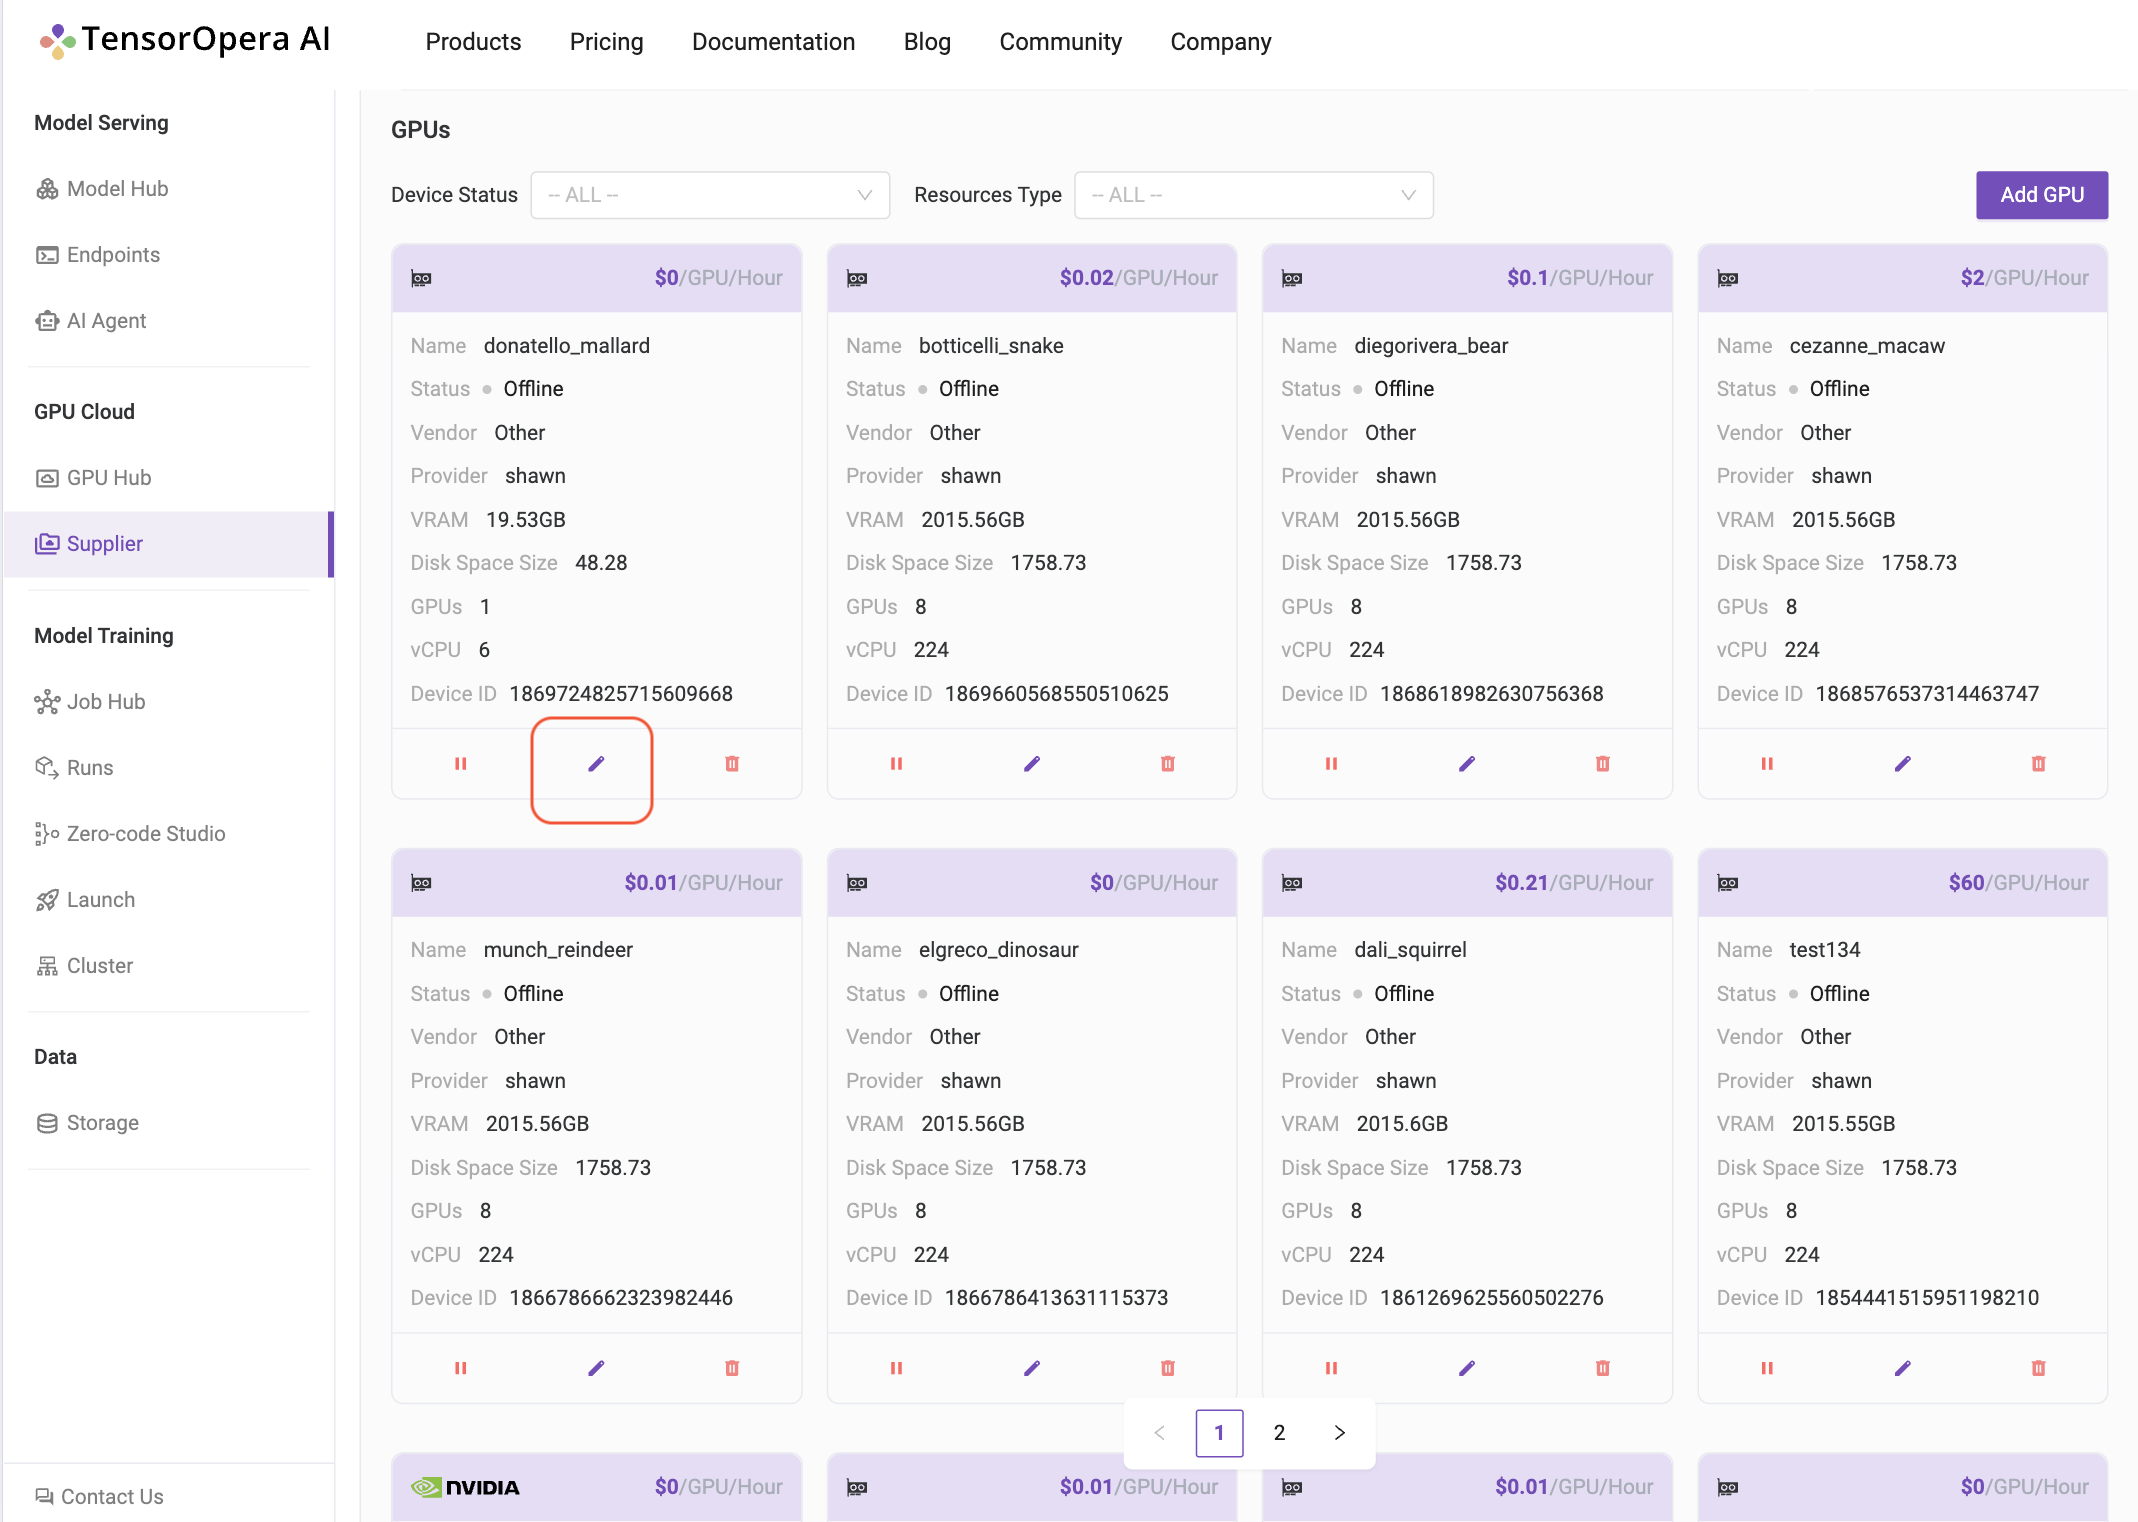
3.2) Fill in the details of your GPU server and click on Submit button.
Most info is pre-filled for you. The fields that need to be filled are:
Name: the name of the GPU serverCost per hour: how much you want to charge the GPU server per hourCommunication Protocols [optional]: option to change the prefilled cross- and intra-node communication protocolsSpecify Dedicated Customers [optional]: indicate whether to share the GPU server with specific usersDeployment Only [optional]: indicate whether the GPU server will be used only for deployment; by default every server is used for training
Be mindful while deciding the Cost per hour for your GPU server. Setting the cost very high may put you at disadvantage, as the matching algorithm prioritizes cheaper GPU servers.

Head back to the Supplier page on platform and verify that the GPU server is added to your list of active GPUs:
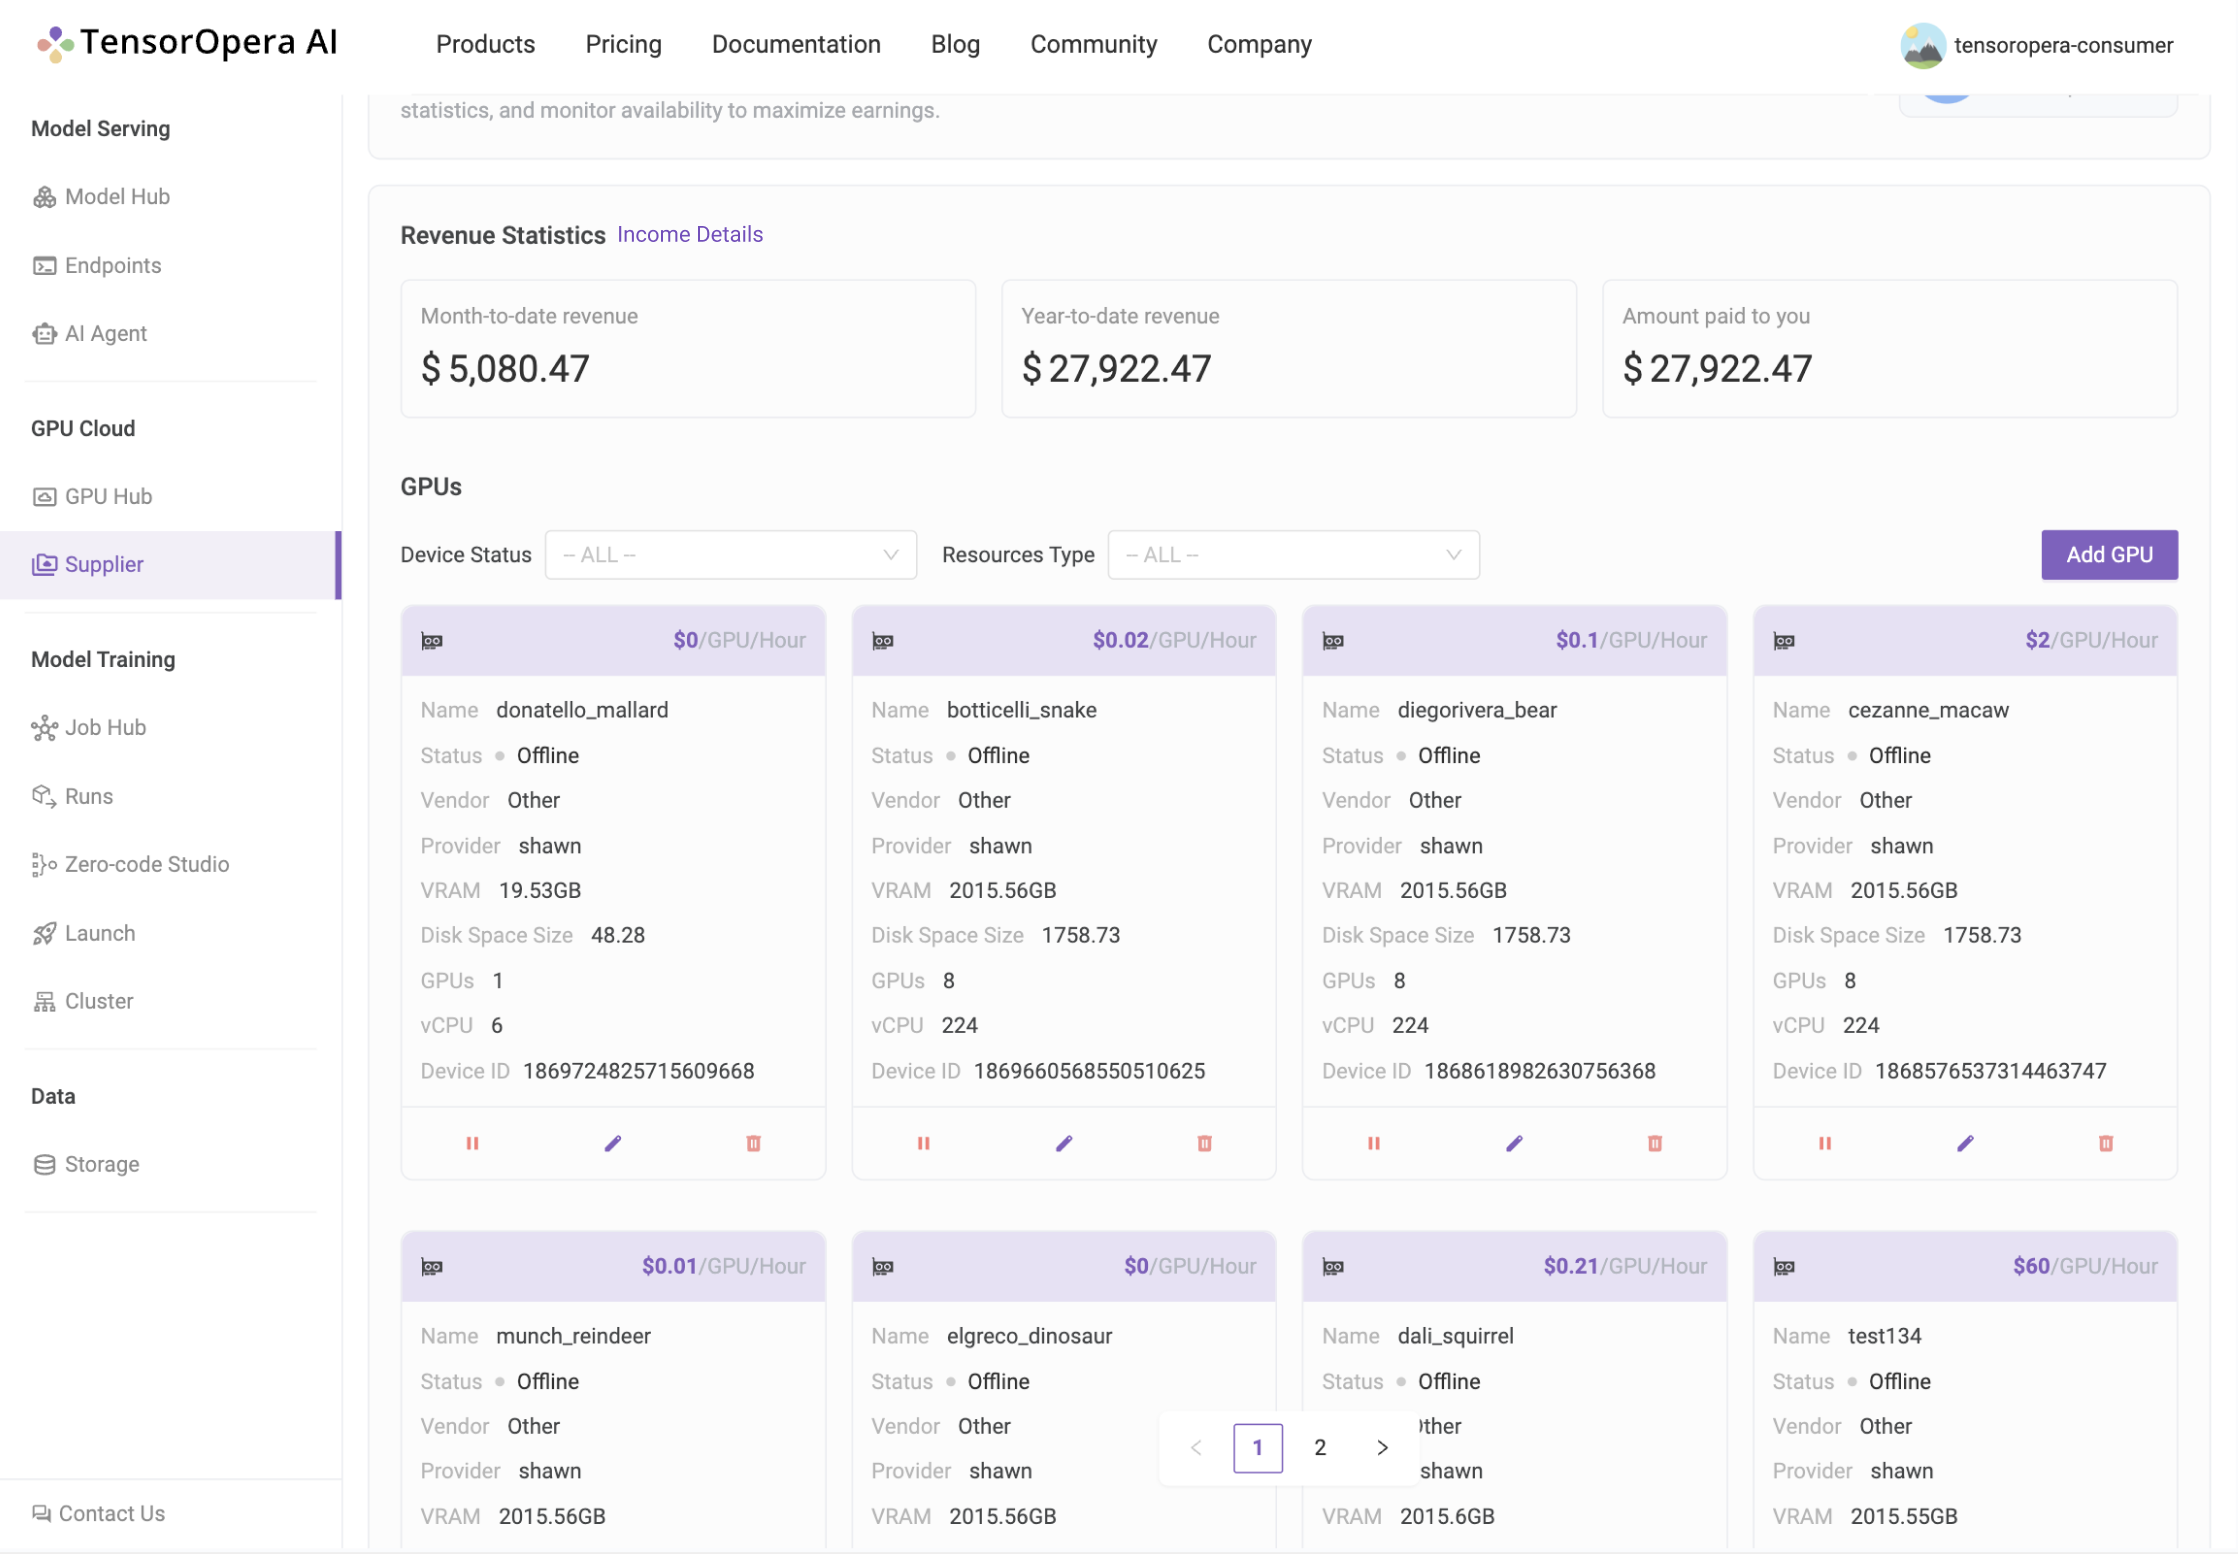
4. Sit back, relax and get paid by TensorOpera AI.
Hard part is over, now comes the fun part.
Your GPU server will automatically be added to the resource pool and jobs that match the specifications will be scheduled.
All you have to do is sit back, relax and get paid (💵) by TensorOpera AI.
You can also monitor your earnings on the Supplier page:
Frequently Asked Questions?
What if my node binding failed?
Kindly refer to this documentation to ensure that your node possesses the necessary environment prerequisites: Node prerequisites for binding to FEDML Platform
How to make sure my node is successfully binded to the platform?
Verify the installation of fedml environment on your GPU server:
sudo wget -q https://doc.fedml.ai/shell/verify_installation.sh && sudo chmod +x verify_installation.sh && bash verify_installation.sh
The output should look like below:
✔ Miniconda is installed.
✔ fedml is installed in the fedml conda environment.
✔ Docker is installed.
✔ Redis is installed.
✔ NVIDIA Container Toolkit is installed.
✔ All components installed successfully.
If any of the above components failed to install, please execute the following command to do a hard clean of fedml environment and re-try the process from the beginning:
fedml logout; sudo pkill -9 python; sudo rm -rf ~/.fedml; redis-cli flushall; pidof python | xargs kill -9
Verify the node is successfully binded to platform:
ps aux | grep fedml | wc -l
❌ If the output of above command is anything <10, then that means the node was not binded to the platform:

✅ Otherwise, it means node was successfully binded to the platform:
